Here's the part nobody selling you a lock wants to lead with: you cannot make a trail camera theft-proof. A research team in Australia spent ten years building steel security posts — a camera boxed in steel, welded to a post, sunk a meter into concrete — and thieves still beat them with angle grinders, pneumatic jacks, and on one occasion a vehicle-mounted hydraulic crane. If a determined person with power tools and time wants your camera, they will get it.
So that's not the goal. The goal is to be a harder target than the next camera down the trail. Almost all trail-camera theft is a crime of opportunity — a passerby who sees what looks like a hundred-and-fifty dollars hanging at eye level, grabs it in a few seconds, and walks off to resell it. People like that rarely carry bolt cutters. If your camera takes more than a few seconds of effort, they almost always give up and move on. Everything in this guide is built around that one idea: raise the effort, lower the visibility, and have a plan for the day one walks anyway.
It's worth knowing how common this is before you decide how much trouble to go to. In the largest survey of the problem — 407 professional camera users worldwide — 74% had personally had a camera stolen. When a separate global survey asked researchers to name the biggest limitations of camera trapping, theft came second only to cost. This is not bad luck happening to a few unlucky people. It's a routine, expensive, worldwide tax on running cameras, and the practitioners losing the most gear have thought harder about stopping it than anyone trying to sell you an accessory.
You cannot make a trail camera theft-proof — so don't try to. Make yours more trouble than it's worth, and have a plan for the one that walks anyway.
Why cameras get stolen — and why the "obvious" rules are half wrong
A couple of widely repeated beliefs turn out to be shakier than they sound, and it's worth clearing them up because they shape where people put cameras.
The first is "theft only happens near towns." Mostly true, not reliably so. In the big survey, 96% of thefts did occur within 50 km of a settlement — but nearly 20% happened more than 100 km from the nearest town, and one desert project lost cameras more than 1,000 km from anywhere. The authors' conclusion is the useful part: theft tracks human activity, not distance from a post office. A remote valley used by people for logging, dumping, or poaching can be far more dangerous to a camera than a suburban park.
The second belief is "cameras on trails get stolen; cameras off trails don't." The flagship survey actually found theft was not correlated with on- versus off-trail placement — it correlated with human activity. But a four-year Tasmanian study of 564 camera sites and over 316,000 camera-days sharpened that considerably. Modeling 112 thefts, it found theft risk dropped where there was lower vehicle traffic, greater distance from town, and a gate blocking vehicle access — and, surprisingly, foot traffic didn't significantly raise the risk. Read those two studies together and a clear picture emerges: it's vehicle access that gets cameras stolen. A thief on foot has to carry your camera back out; a thief who can drive to within a few meters can take ten. Gates, distance, and getting off the road do real work.
Theft follows people who can reach your camera easily — and especially people who can drive to it.
That reframing matters because it tells you where to spend effort. Hardware is the visible, satisfying part of theft prevention, but the evidence keeps pointing at placement. In Costa Rica, a study of wildlife underpasses under a highway lost 65% of its cameras despite every one having a metal case, a lock, and a warning sign. The cases and locks were fine. The problem was bolting cameras to a spot any person could stroll up to, next to a road. No box saves a camera from the wrong location.
Placement: the cheapest theft prevention there is
If you do nothing else from this article, get your cameras away from where people go and up out of where people look.
Get off the beaten path — and account for distance. The single most-cited number in the practitioner world comes from research finding that the vast majority of hunters don't venture more than about a third of a mile from a road. So if you can put real distance between your camera and any access point — a road, a parking area, a gate, a well-walked trail — you've already shed most of the casual foot traffic. One widely used rule of thumb is to get at least half a mile from any access point; another is to keep cameras at least 30 meters back from the nearest track and tuck them behind natural barriers like brush piles, fallen logs, or broken terrain. The exact distance matters less than the principle: every meter between your camera and the path is a meter a thief has to choose to walk.
A word of caution that catches people out: not every trail is on a map. Before you commit to a spot, scan the area within 10–20 meters for boot prints or bike tracks — the routes people actually use get worn in over time and won't show up on your GPS.
Mount high, angled down — within reason. People walking through the woods look at the ground and roughly waist height; they're thinking about footing, not scanning tree trunks at three meters. Put a camera above that natural sight line and most people walk straight past it. Practitioners commonly hang public-land cameras 8 to 12 feet up (roughly 2.5–3.5 m), angled down onto a trail, creek crossing, or pinch point, using a climbing stick to get up there. Height does triple duty: it hides the camera from a casual glance, it puts the camera out of arm's reach so a thief needs a ladder or climbing gear, and it tends to keep the unit out of a wary animal's eyeline too.
But there's a real cost to going high, and it's the most important caveat in this whole guide. When the same Australian team that fought the theft war tested it properly, they mounted paired cameras at 0.9 m and at 3.5 m on the same trees and compared what each captured. The high cameras — and cameras angled steeply downward — detected significantly fewer animals. The reason is physics: a camera's motion sensor needs to sit roughly level with the animal's body heat to trigger reliably. Hoist it three and a half meters up and point it down, and it simply misses things that walk underneath. The researchers' verdict was blunt — saving the camera while sacrificing the data "is unlikely to be an acceptable outcome".
Mount it high enough to dodge the thief and you may mount it too high to see your animals. That trade-off is real, and it's yours to manage.
So treat height as a dial, not a switch. A camera hung a couple of feet above head height, angled gently down, captures the trade-off most people want: out of the casual line of sight, still low enough to trigger on the animals you're after. Reserve the extreme heights for places where theft risk is genuinely severe and you've accepted you're hunting larger subjects at closer range. Don't copy a researcher's 3.5-meter rig as if it were best practice — for them it was a desperate anti-theft measure that hurt their own data.
Locks, cables, and boxes: making the grab take longer
Once you've sited the camera well, hardware is about buying time — converting a two-second grab into a job that needs tools and a return trip.
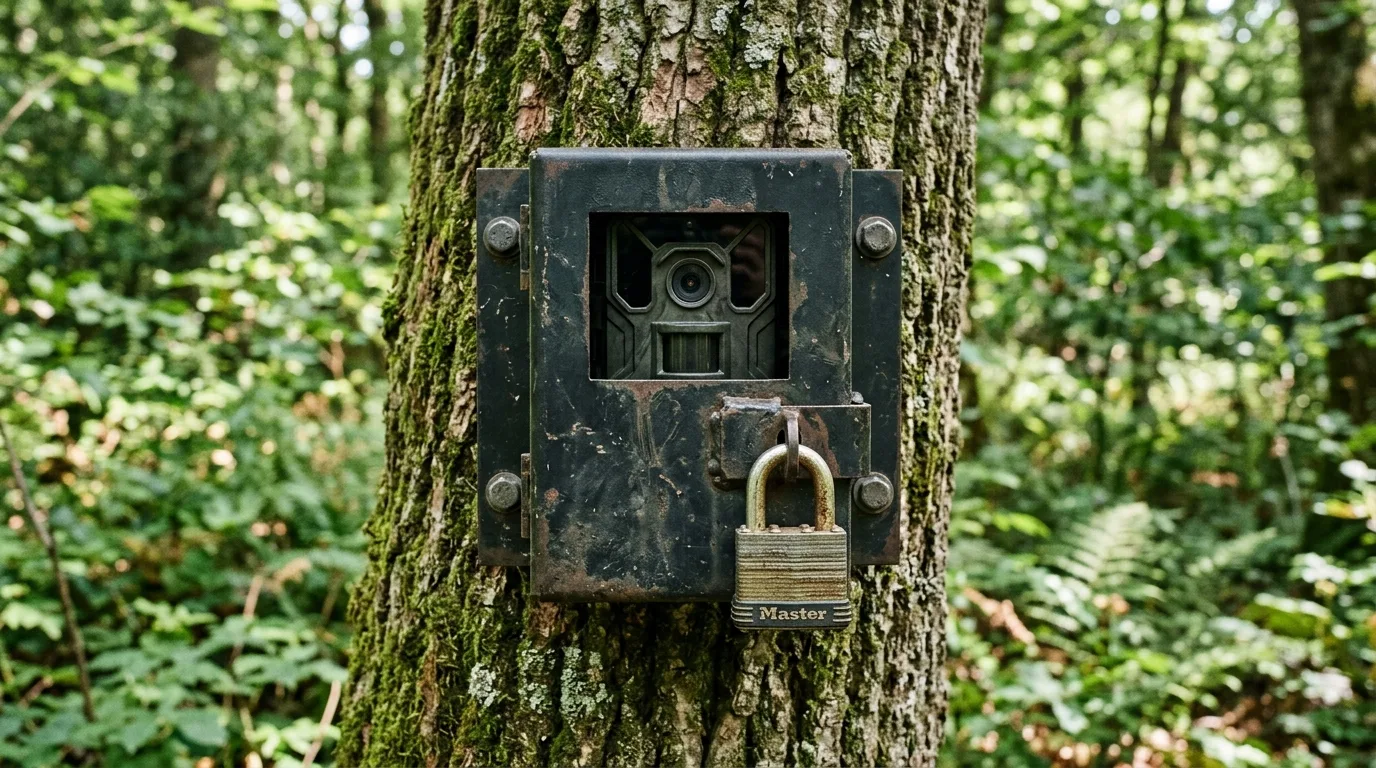
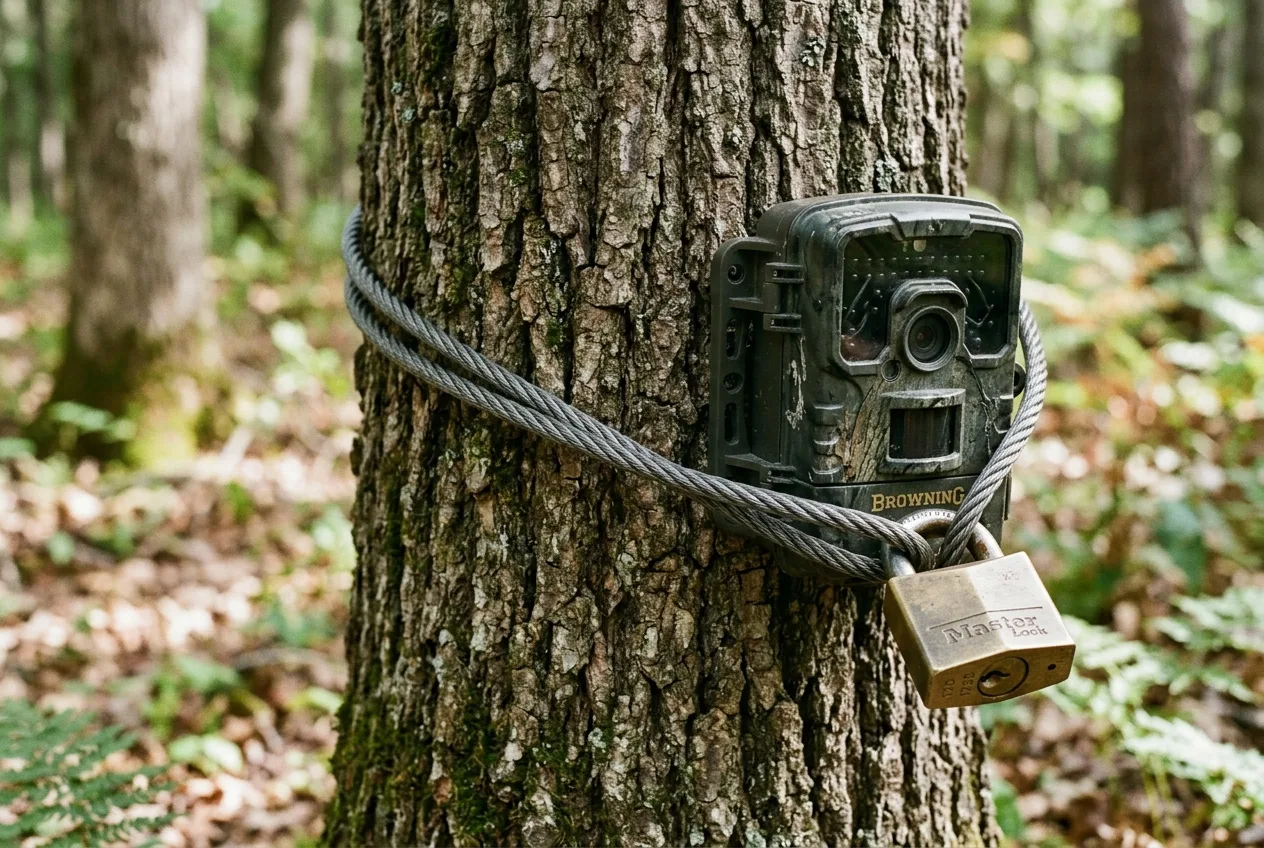
Start with a python-style cable lock. This is the highest-value piece of gear you can add, full stop. A flexible braided-steel cable threads through the lock slot on the camera and wraps around the tree or post. On public land, treat it as mandatory: it's "by far your best line of defense," and at a minimum it forces a thief to come back with bolt cutters or a saw. One field write-up estimates a cable lock alone stops on the order of 90% of opportunistic theft, simply because most thieves are looking for an easy score and won't carry cutting tools. It's trusted enough that government field crews list a python cable lock as standard kit for any camera at a public site. A cable-style lock beats a chain here because it cinches tight to the tree and leaves no slack for a tool to bite on.
A couple of practical notes the manufacturers' how-tos get right. Lock to a tree that's at least about 15 cm in diameter — thinner trunks are quick to cut through, and skinny trees wobble and shift the camera over time. And if the camera's going to live out there for more than about six months, don't crank the cable bar-tight: the tree keeps growing and can squeeze the lock until it seizes. Leave a little slack and give the mechanism a shot of water-repellent lubricant once a year, especially in wet country.
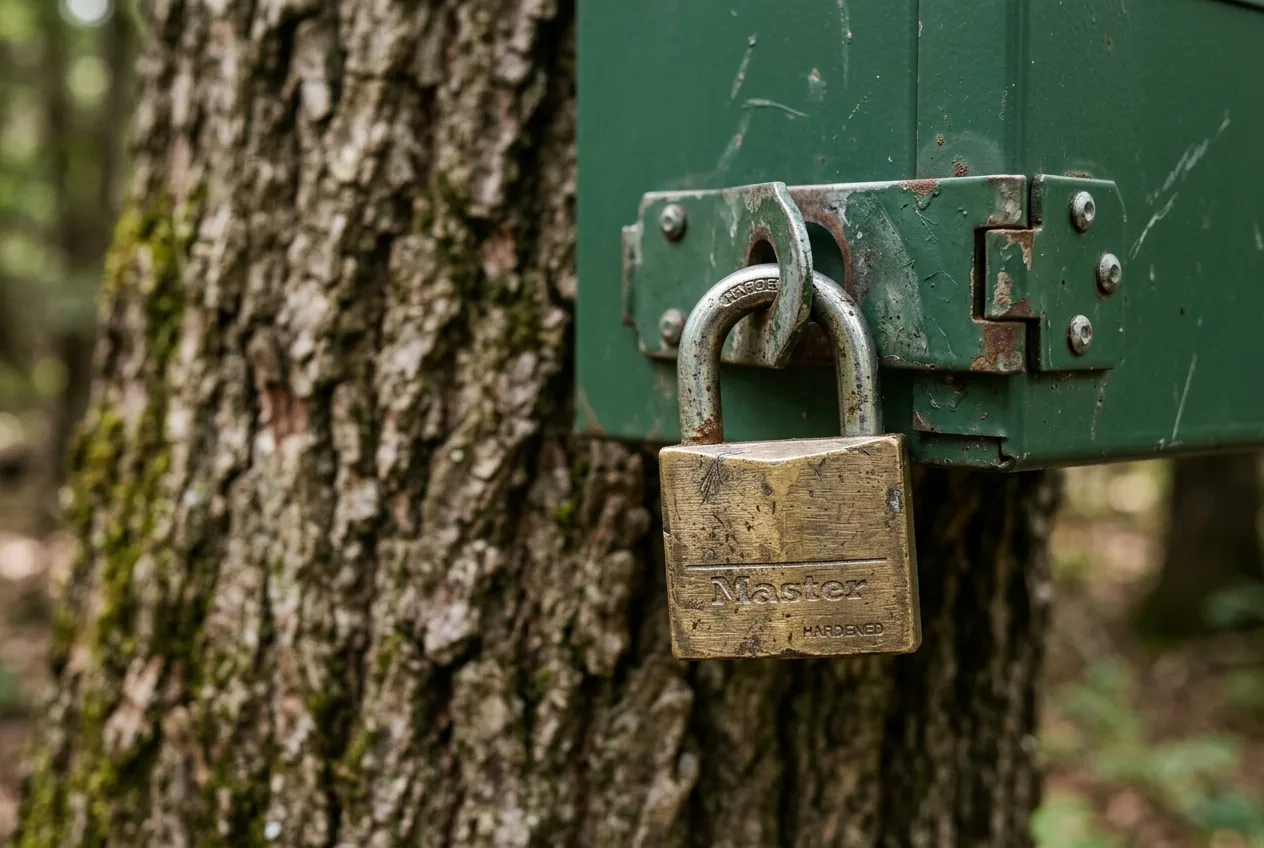
Lock the camera shut, not just to the tree. A cable around the trunk stops someone walking off with the whole unit, but it doesn't stop someone flipping the case open and pocketing your SD card. Many cameras have extra holes that let you padlock the housing closed, or route the same cable through the front of the case so it can't open while it's mounted. If your model supports it, do it — a stolen card is a stolen season's data.
Add a steel security box where the risk justifies it. A lock box is a metal shell that encloses the camera, leaving the lens and sensors exposed, and bolts or cables to the tree. It's the serious end of target-hardening: a casual thief can't pry it open, and as a bonus it protects the camera from bears and other large animals that like to chew electronics. Two honest caveats. First, buy the box made for your exact camera model — a generic box can block the motion sensor or flash and quietly ruin your captures. Second, boxes are bulky and add up in cost, so they're not for every camera; reserve them for high-value units and high-risk locations — near roads and parking, on a food plot, anywhere with a known theft problem. As one UK guide puts it, if the camera is already well hidden, a cable lock alone is usually enough; the box is the extra layer for when it isn't.
You do not have to spend much for this. A student conservation group documented a tidy do-it-yourself tether — about 20 meters of 5 mm steel wire and a handful of U-bolts, roughly £17 for six cameras' worth — that threads through the camera's mount points and clamps around the tree. It won't beat a dedicated lock box, but it's a real deterrent for almost no money, and it makes the point that "secured" doesn't have to mean "expensive."
If you want a sense of the absolute ceiling — and why hardware alone isn't a strategy — look at what it takes the professionals. Their engineered steel security posts went through a decade of redesign as thieves kept finding new ways in; the latest version they describe as "the most formidable," not breached yet. The honest read on that isn't "buy a steel post." It's that even a ten-year, purpose-built engineering effort ends as an arms race. For the rest of us, the win is making the camera annoying enough that the opportunist quits — not building something nobody can crack.
A lock doesn't have to be uncrackable. It just has to outlast a thief's patience — and the patience of someone without tools runs out in seconds.
Hiding the camera (and the giveaways you forget)
Concealment and locks solve different problems. A lock makes a spotted camera hard to take; concealment keeps it from being spotted in the first place. You want both, because the camera a thief never notices is the one you never lose.
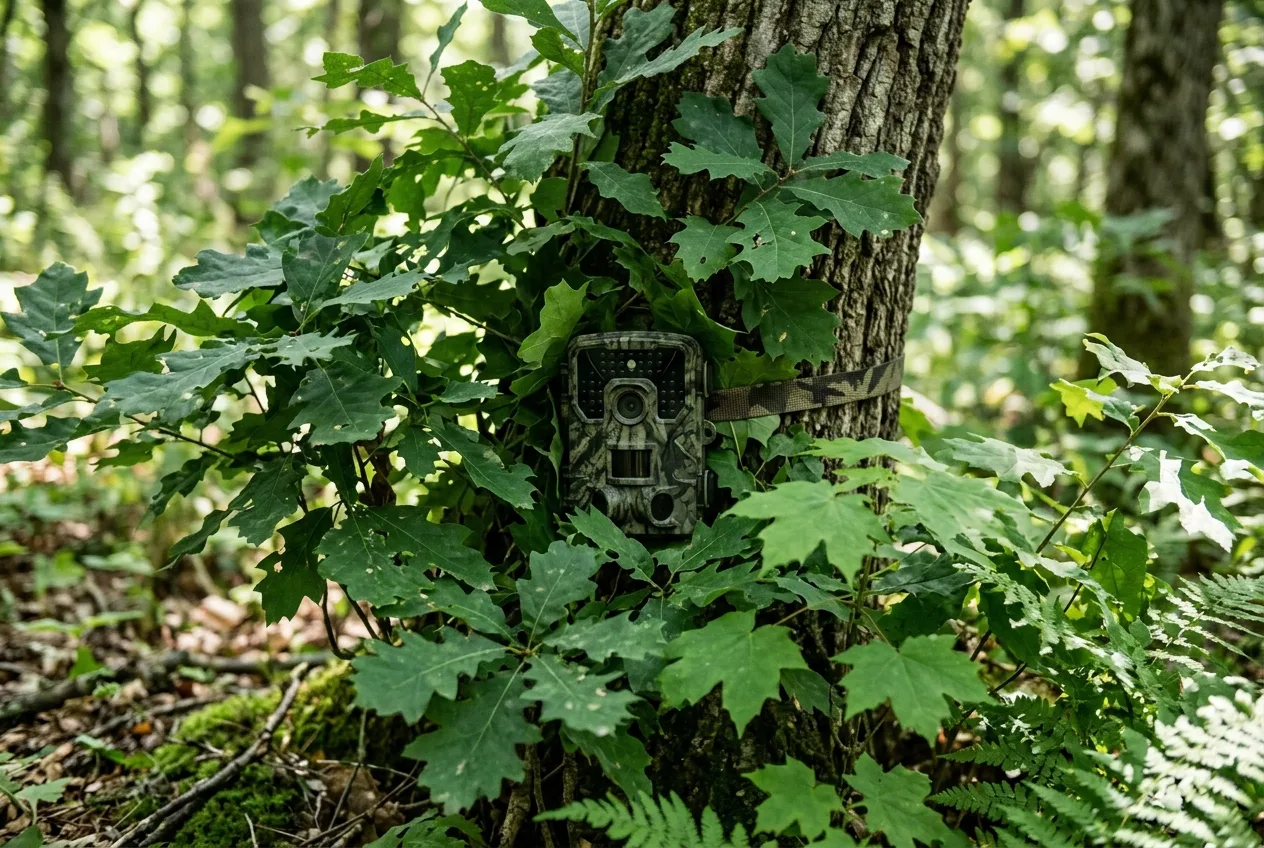
Break up the shape. A trail camera is a boxy, hard-edged, man-made object in a world of organic lines, and that outline is what catches a human eye. Don't trust the factory camo finish to do the work — it's a start, not a disguise. Tuck the camera into the deep shadow of a trunk or into backlit cover rather than a clean, open spot, and use natural material from right there — bark, leaves, a few broken branches — to soften the edges, taking care never to cover the lens or the sensor. (If you use fake foliage, the kind that won't brown and turn into its own eye-catching mismatch is worth the extra few dollars.)
Now the giveaways people forget, because they're almost always what gets a hidden camera found:
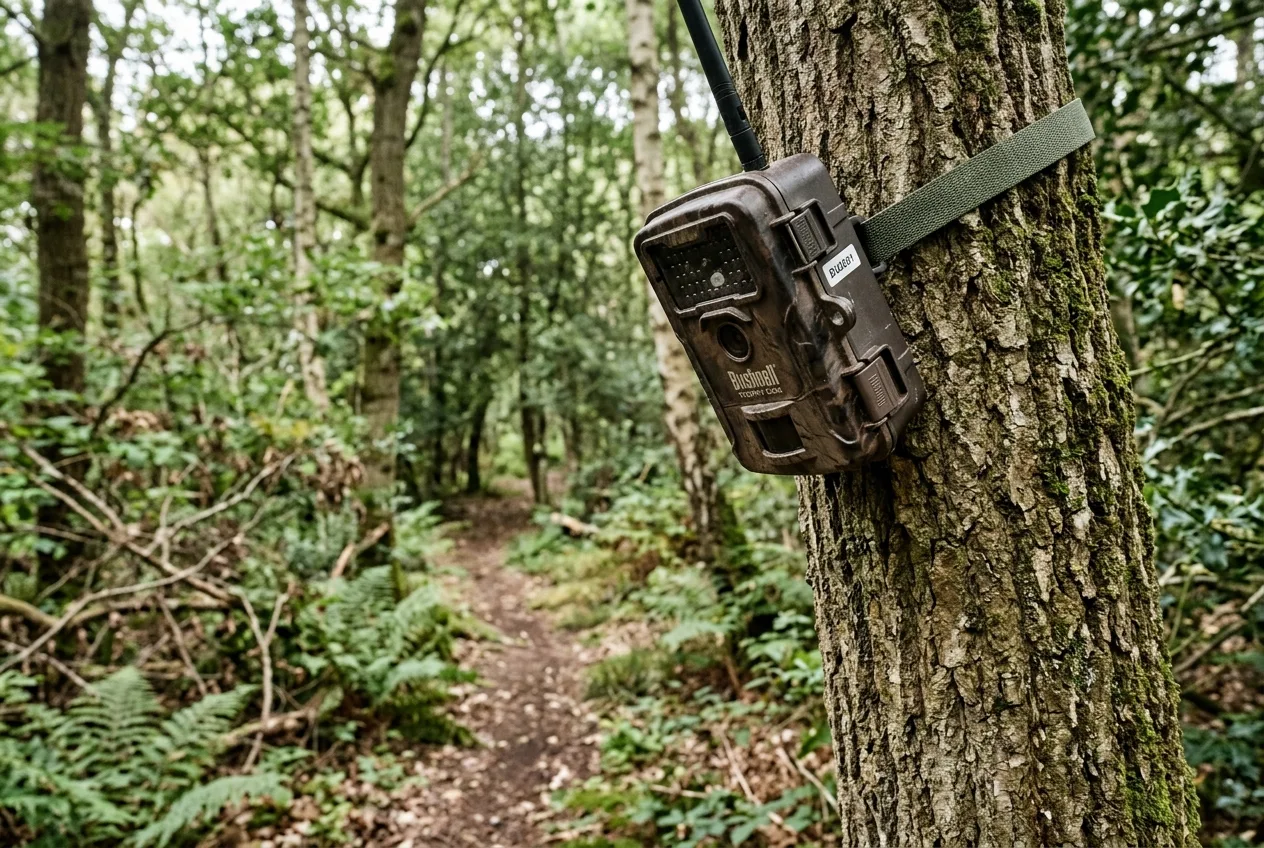
- The strap. The black factory strap is arguably the single most common tell. It wraps a full 360 degrees around the tree, contrasts hard against most bark, and is visible from any direction at eye level. It gets worse in winter — a line of snow settles along its top edge and underlines exactly where your camera is. Fixes: spray the strap in earth tones (or buy a camo one), or skip the strap entirely and use a small screw-in mount or bracket, which gives the whole setup a much smaller profile.
- Your own tracks. A practitioner who left cameras up after a hunt, then walked in to check them after fresh snow, lost six cameras in a single day — his footprints led straight to every one. The lessons he drew: don't visit cameras when there's snow on the ground, and on busy public ground, check them mid-week or on rainy days when fewer people are out.
No-glow infrared: stay invisible after dark
Everything above is about the daytime silhouette. At night, a camera can give itself away with light.
All trail cameras illuminate night shots with infrared, and the LEDs come in two flavors. Low-glow (850 nm) emits a faint red glow when the camera fires — dim, like a TV standby light, but visible if someone's looking. No-glow (940 nm), also sold as "black flash," sits far enough into the infrared that it's effectively invisible to the human eye; when it fires at night, there's nothing to see. Above roughly 940 nm, the light isn't detectable by most people or animals, which is exactly why no-glow is the standard pick for covert and security work.
For theft prevention the implication is simple: if you're worried about people, run a no-glow camera. A low-glow unit that winks red every time it triggers is announcing itself to anyone walking the area after dark; a no-glow one doesn't.
There is a genuine trade-off, and it's worth knowing so you choose with open eyes. Pushing the wavelength out to 940 nm costs roughly 30% of the infrared light a low-glow camera of the same size would throw. In practice that means a no-glow camera has a shorter night range, a slower shutter (so more motion blur on a moving animal), and grainier, lower-contrast night images. If a camera is purely for wildlife on your own land and stealth from people isn't a concern, low-glow gives you sharper night photos. The moment people are part of the equation, no-glow's invisibility is usually worth the image cost — just site it close enough to your target that the shorter flash range still reaches.
One myth to retire while we're here: no-glow is not mainly about not spooking animals. Most mammals see the faint red of a low-glow camera and the "invisible" no-glow about the same — they perceive a glow either way; only birds reliably see one and not the other. So choose no-glow for the human eyes you're hiding from at night, not on the theory that deer can't tell the difference. They often can.
Cellular and GPS cameras: when the photos (and sometimes the camera) survive the theft
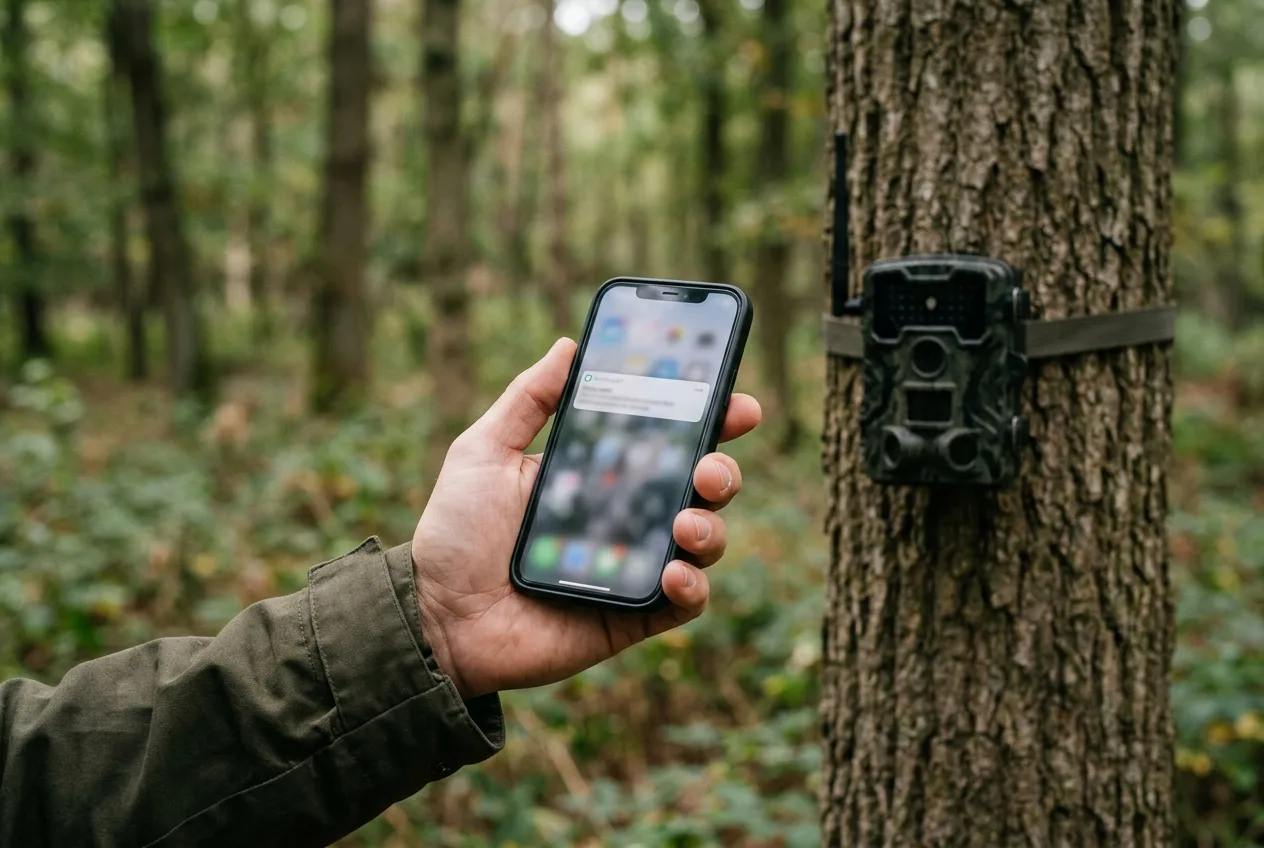
So far this is all prevention. Cellular cameras change the equation on the recovery side, and they're the closest thing to a genuine edge against theft that's appeared in years.
A cellular camera sends each photo to your phone or the cloud moments after it's taken. The practical magic for theft is that the images are off the device before a thief ever touches it. Take the camera and you've still got a clear photo of whoever walked up to it — often the thief's own face. That alone reframes the loss: you're out a camera, but you have evidence, and you knew within minutes.
Most cellular cameras now also carry GPS. At a basic level the app shows each camera's location on a map and updates it if a camera moves. Better implementations go further: they alert you when a camera has moved from where you left it, and some apps can then track the stolen unit by GPS. A common thief's counter is to rip out the tracker — a fair point a field engineer raised, since a GPS chip often has an obvious antenna and is the first thing someone would pull. Manufacturers have answered in a couple of ways; one line of cameras hides a second internal battery specifically to keep the GPS alive even after the main batteries are removed.
How well does this actually work? Here's a real case, limits and all. A hunter's cellular cameras caught trespassers tampering with them, so he and a friend immediately reported the cameras stolen to the manufacturer, which logged a file in case anyone reactivated them. Months later, a thief powered one up — and the GPS-equipped model sent four photos and its coordinates straight to the owner's phone. He copied the location, his friend called the police to meet him there, and they recovered both cameras the same evening. The instructive part is the friend's second camera: it had no GPS, so it captured photos of the thieves but no coordinates. Lesson learned twice over — GPS recovery only works if the model has GPS and the thief is careless enough to switch it back on. It's a strong tool, not a guarantee.
If your camera is stolen: do this first, ideally beforehand
Recovery odds are made or broken before the theft, by one boring habit.
Record every camera's make, model, and serial number — and mark it as yours — the day you buy it. This is the single cheapest thing in this guide and the one most people skip. Police crime-prevention programs are explicit about why: if you report a camera stolen and you have the serial number, it can be entered into a database and flagged, so the moment it surfaces — at a pawn shop, a returns counter, a resale listing — it can be traced back to you and returned. Report it without the serial number and it is, in their words, simply not traceable. Beyond the serial, add your own mark — engrave or write an identifier on the body, and a contact label inside. Researchers etch a name and phone number into the plastic; others use waterproof stickers with a project name and "contact me" note, which doubles as a mild deterrent.
This isn't theoretical. One hunter's stolen camera was returned for cash at a big-box outdoor store an hour from where it was taken; staff spotted his information on the back, realized it was stolen, and mailed it home to him. A serial number and a name on the case turned a lost camera into a recovered one.
When a camera does go missing, work it in this order:
- Pull whatever images you have. If it was cellular, you may already have a photo of the person or their vehicle. That's your best lead.
- If it had GPS, report it to the manufacturer right away and ask them to flag the unit, so you're notified if it's reactivated and can retrieve its location.
- File a police report with the make, model, and serial number, plus the time and place — that official record is what lets recovered gear be matched back to you and supports any charges.
- Don't confront anyone yourself. In the recovery story above, the camera's owner specifically told his friend to call the police to meet him at the GPS location rather than approach the thief alone. A camera is not worth your safety.
The cheapest theft-recovery tool you own is a notebook: the serial number you wrote down before the camera ever went in the woods.
A note on signs, decoys, and not advertising your spot
A few odds and ends that are worth a sentence each, with honest expectations.
Warning signs help — a little, and politely. Many field teams attach signs, and the research is mildly encouraging: overtly polite wording seems to reduce interference better than threats. Plenty of practitioners also bluff — "this device is GPS-tracked," "we only keep animal photos and delete people" — aimed at making a would-be thief hesitate. Don't expect a sign to stop a committed thief, but a courteous note costs nothing and occasionally works.
Decoys can catch a thief, not prevent the loss. A trick that's worked for some: set an obvious, dead camera in the open and hide a second working camera nearby, pointed at the decoy. One landowner photographed a couple stealing the bait camera in plain sight while the hidden one recorded the whole thing. It's extra gear and effort, and it's about catching a thief rather than keeping your camera — useful if you've got a repeat problem.
Don't broadcast your camera's location. This one's easy to overlook. If you share or publish where your cameras are — exact coordinates in a post, a public dataset, a tagged photo — you may be handing a map to the very people you're guarding against. Data-management best practice for camera locations is to generalize the position rather than publish a precise pin, exactly because the locations of active cameras are sensitive. Keep your spots to yourself.
The realistic playbook
Pull it together and a sensible setup for a camera you care about looks like this: site it well off any road or access point and behind some natural cover; mount it above the casual sight line but not so high you stop seeing animals; run a python cable lock, with a model-fit steel box where the risk is high, and lock the housing shut to protect the card; choose no-glow IR so it stays invisible after dark; record the serial and mark the camera before it ever goes out; and where it fits the budget, run cellular so the photos — and maybe the camera — survive a theft. Then accept that you've shifted the odds, not eliminated the risk, and don't put a four-hundred-dollar camera somewhere you'd be heartbroken to lose it.
None of this makes a camera untouchable. It makes yours the one the opportunist skips — and the one you've got a real shot at getting back. In a world where three out of four serious camera users have already been hit, that's the win that's actually available.
Frequently asked questions
Can a trail camera really be made theft-proof?
No. Even purpose-built steel security posts, refined over a decade, were eventually breached with power tools — so "theft-proof" isn't the goal. The realistic aim is to make your camera enough of a hassle that an opportunistic thief moves on to an easier one, since that's the vast majority of theft.
What's the single most effective anti-theft step?
Two things tie. A python-style cable lock is the highest-value piece of hardware — it stops the grab-and-go theft that makes up most losses and forces a thief to return with cutting tools. But placement is just as powerful: getting well away from roads, parking, and access points sheds the casual traffic before any lock is tested.
Does mounting a camera high actually work — and what's the downside?
Mounting high and angled down does reduce theft: people scan at eye level and rarely look up, and an out-of-reach camera needs a ladder to grab. The catch is detection. A controlled study found cameras placed around 3.5 m up, angled down, captured significantly fewer animals, because the motion sensor sits above the animal's body heat. Go high enough to deter thieves, but not so high you stop seeing wildlife.
Should I buy a no-glow camera to prevent theft?
If people are a concern, yes. A no-glow (940 nm) camera emits no visible light when it fires at night, so it won't reveal itself to anyone passing after dark — the standard choice for covert use. The trade-off is roughly 30% less infrared light, meaning shorter night range and grainier images than a low-glow camera, so site it close to your target.
My camera was stolen and I don't have the serial number. Can I still get it back?
Your odds drop sharply. Police recovery programs note that without the serial number, a stolen item generally can't be traced back to you even if it's recovered. That's why the serial is worth recording the day you buy the camera. If it was a cellular model you may still have a photo of the thief, and a GPS model can sometimes be located if it's reactivated. File a police report with whatever details you have.
Are cellular cameras worth it just for theft protection?
For many people, yes — they shift the problem. Because images upload immediately, you keep the photos (often including the thief's face) even if the camera is taken, and you find out within minutes. Many also have GPS that can alert you to a move and, in the right conditions, help recover the unit. They cost more to buy and run, but they turn a total loss into evidence and a chance at recovery.