Here's a number worth sitting with: in good, clean light at base ISO, the brightest stop of tones your sensor records uses up fully half of all the data it can store. The next stop down gets half of what's left. The darkest shadows get the crumbs. That single fact — that light is hoarded at the bright end and starved at the dark end — quietly explains most of what separates a crisp, clean wildlife frame from a muddy, noisy one. It's why "get the exposure right in the camera" isn't nagging; it's physics.
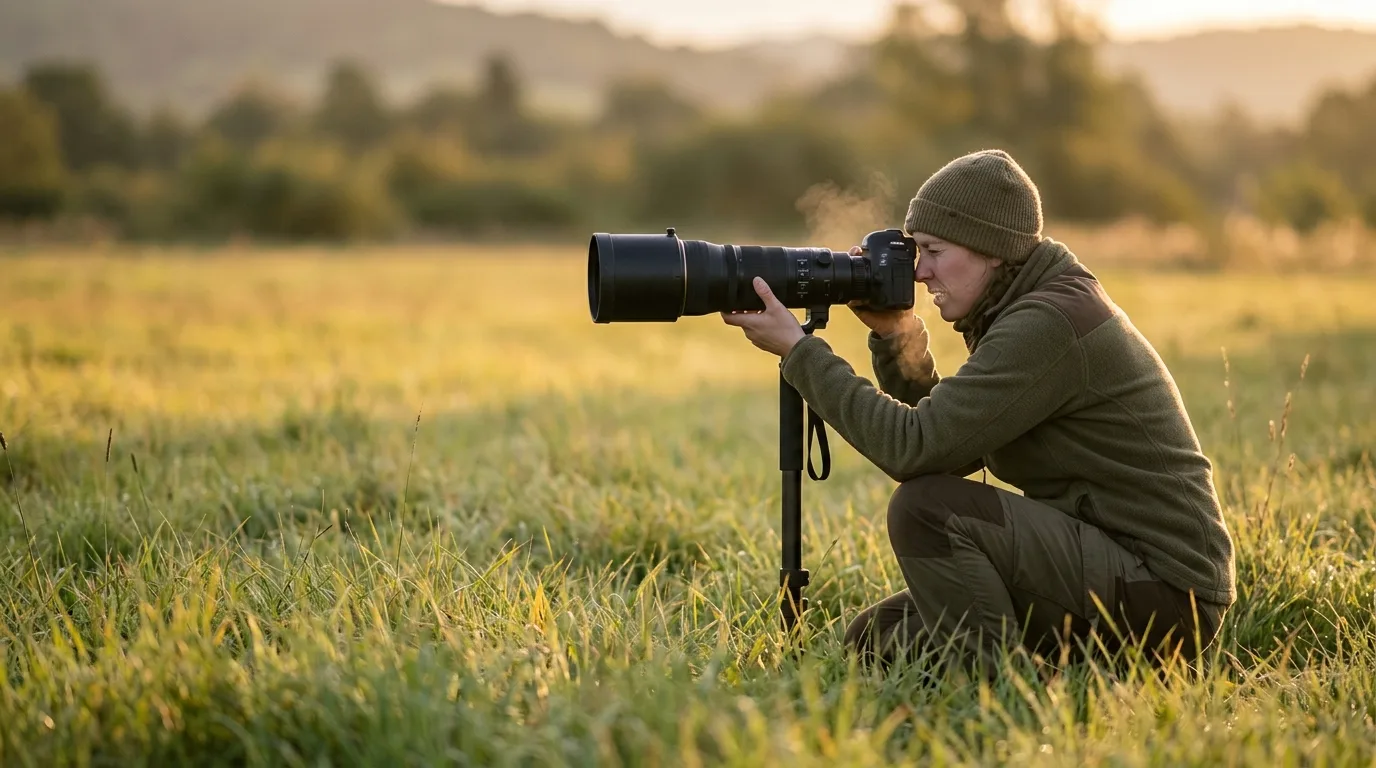
So before the section-by-section detail, here's the honest short version of wildlife photography camera settings. You want the fastest shutter speed the situation needs and no slower — because the most common cause of a blurry animal photo is too long a shutter. You want your aperture fairly wide (somewhere around f/4 to f/8 for most subjects) to gather light and throw the background out of focus, putting all the attention on a sharp eye. You let ISO be whatever it has to be to keep that shutter and aperture where you want them — and you stop apologizing for noise, because noise can be fixed in editing and motion blur cannot. You shoot continuous autofocus with subject or eye detection on a moving animal, and you set your drive to a short burst so you don't miss the one frame where it looks up. Everything below is how to make those four calls well, and when to break each one.
The exposure triangle, the way it actually works on an animal
You've seen the triangle before: shutter speed, aperture, ISO, three settings that together decide how bright the photo is. What the diagram never tells you is that for wildlife, the three legs are not equal partners. They're a hierarchy, and the order is usually shutter, then aperture, then ISO.
The reason is the subject. Animals move, you're often zoomed in tight with a heavy lens, and the light is frequently poor because dawn and dusk are when things are out and active. Every one of those facts pushes the same direction: toward needing a fast shutter. So the practical mental model isn't "balance all three equally." It's closer to what one wildlife pro calls the throwaway variable: in any given genre, one of the three settings has a value that genuinely doesn't matter because the other two are pinned by the shot. Photograph a sunset landscape and the shutter is the throwaway — whatever the light gives you is fine. Photograph wildlife and ISO is the throwaway, because aperture and shutter are doing the important work and ISO just lands wherever it must to make the exposure correct.
It helps to know how the three trade off in even units. Each "stop" is a doubling or halving of light, and all three speak that language. Double the ISO (say 200 to 400) and you can halve the shutter time — 1/125 s becomes 1/250 s at the same brightness. Open the aperture one stop (f/5.6 to f/4) and you've bought another doubling of light to spend on a faster shutter. That interchangeability is the whole game: you decide which leg matters most for this animal, lock it, and let the other two settle.
For wildlife, the three legs of the exposure triangle are not equal partners — they're a hierarchy, and it usually runs shutter, then aperture, then ISO.
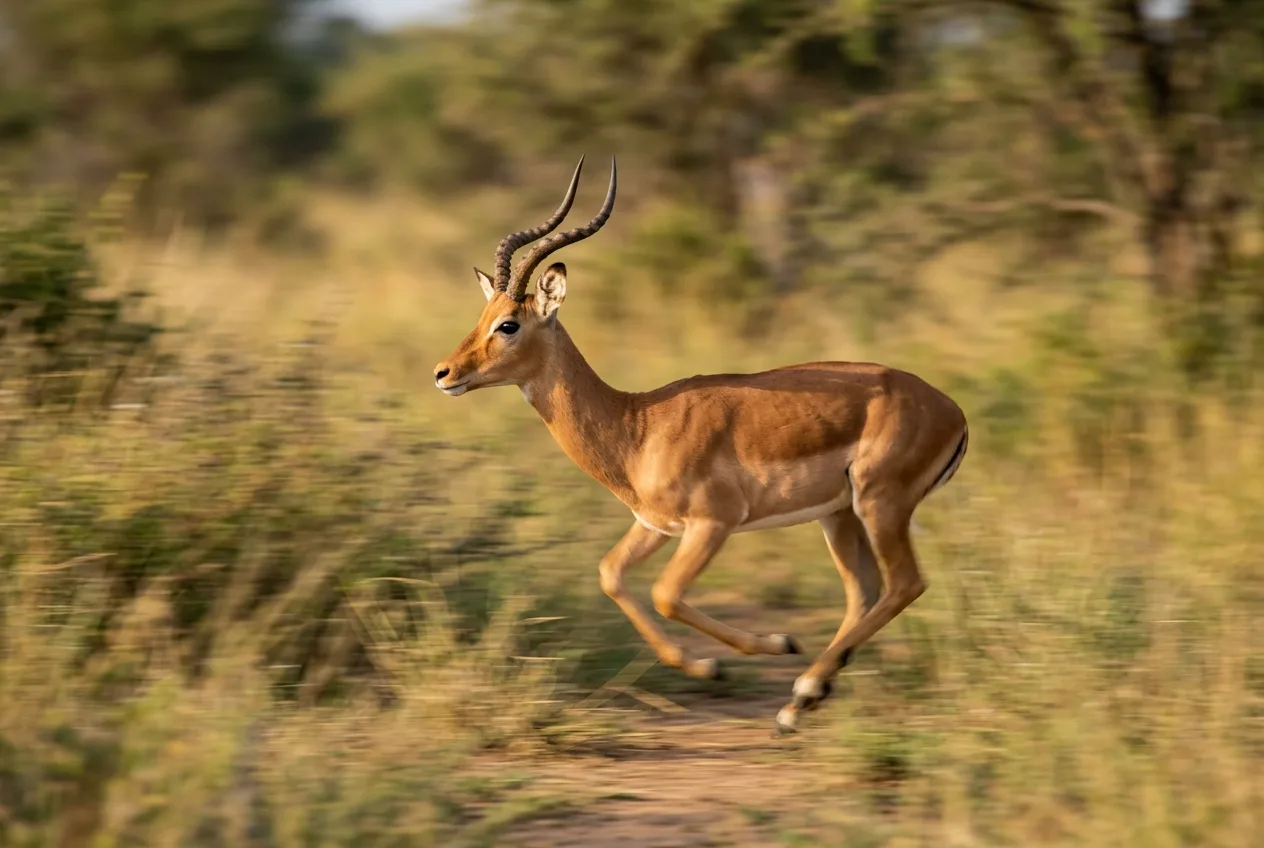
Shutter speed: freeze the motion (and know the speeds by subject)
If you remember one thing, remember this: the single most common cause of a blurry wildlife photo is a shutter speed that was too slow. Not bad glass, not missed focus — just too long a shutter for a subject that wouldn't hold still. So shutter speed is where you start.
There's no universal "wildlife shutter speed," because the right number depends almost entirely on how fast the animal — and the relevant part of the animal — is moving. The most useful framework I've seen comes from safari educator Guts Swanepoel of Pangolin, who teaches five go-to speeds. It's worth walking through because it covers the whole range:
| Subject / intent | Shutter speed | Why |
|---|---|---|
| Panning a slow, big mammal (elephant, etc.) | ~1/10 s | Deliberate background blur, body kept sharp by panning |
| Panning a bird in flight | ~1/60 s | Blurred wings, sharp head — a motion look |
| Sharp handheld minimum | ~double the focal length | Beats camera shake on a long lens (a rule of thumb, not a law) |
| General fast action in good light | ~1/2500 s | Freezes running animals, birds, splashing water |
| Small birds in flight / freezing water | 1/4000 s and up | Stops fast wingbeats and droplets |
Swanepoel is careful to call the "double the focal length" figure a personal rule — "please don't quote me on this," he says — and that honesty matters, because the various handheld rules of thumb don't perfectly agree. One common version is shutter at least 1/(focal length): a 300 mm lens, 1/300 s. Another says faster than the focal length. Pangolin says double it. They're all gesturing at the same truth — longer lenses magnify your own shake, so they demand faster shutters — and modern image stabilization buys some of it back. Treat them as a family of starting points, not gospel: at least roughly 1/(focal length) handheld, and faster for safety, for long glass, and for anything that's moving.
The manufacturers and field shooters fill in the middle of that range and they line up well. OM SYSTEM's wildlife guidance is a default of 1/400–1/1000 s, dropping as low as 1/200 s for slow movers like moose and bison or a stationary owl staring you down, and climbing to 1/800–1/2000 s for a running bear or a bird launching off a perch. Nature TTL's real-world frames tell the same story: a perched owl at 1/400 s, a jumping pine marten kit at 1/1600 s, a handheld waxwing on a 500 mm lens at 1/2500 s. The pattern is consistent enough to internalize: still or slow, 1/200–1/500 s; moving, 1/800–1/1600 s; fast or flying or splashing, 1/2000 s and beyond.
Two refinements the sources insist on. First, an animal coming straight at you is harder to freeze than one moving across your frame, because it's traveling out of your plane of focus and the camera has to keep refocusing — so bump the shutter for head-on approaches. Second, when in doubt, overshoot the shutter rather than undershoot it. As OM SYSTEM's Arthur Lefo puts it, "it's always better for something to be sharp rather than not". You can throw away a frame that's a touch noisy. You can't rescue one that's smeared.
(There's a whole separate craft to freezing fast birds on the wing — wingbeat rates, head-on approaches, the hummingbird problem. That's its own piece: How to Photograph Birds in Flight: Shutter Speed, Autofocus, and Field Technique.)
You can throw away a frame that's a touch noisy. You can't rescue one that's smeared.
Aperture: a sharp eye, a soft background, and enough light
A useful reframe from OM SYSTEM: wildlife photography is, in many ways, portrait photography. You're trying to lift one subject off its background with a tack-sharp eye and a smooth, unbusy backdrop. Aperture is the lever that does most of that work, and it's pulling double duty — it controls both how much light reaches the sensor and how much of the scene is in focus.
The mechanics first, because the f-numbers trip everyone up at the start. The f-number is the lens's focal length divided by the diameter of its opening, so a smaller number means a wider hole and more light. Each full stop — f/2.8, f/4, f/5.6, f/8, f/11 — halves the light as the number climbs. Open wide (low f-number) and you get a shallow zone of focus that melts the background into bokeh; stop down (high f-number) and more of the scene comes into focus, front to back.
For most wildlife, you want to lean wide. OM SYSTEM's working range is f/2.8 to f/5.6, with most wildlife best at f/8 and below. Two reasons: a wide aperture isolates the subject and smooths the background, and — just as important for the rest of the triangle — it floods the sensor with light so you can keep that shutter fast without cranking ISO into the dirt. Nature TTL's general rule of thumb is the same: aperture as wide as the shot allows.
But "wide open" is a starting point, not a reflex, and depth of field is where beginners overcorrect in both directions. Visual Wilderness's Jane Palmer makes the practical case beautifully: she'll shoot a wildlife portrait at f/2.8 or f/4 to blur everything but the face — but for hummingbirds she deliberately closes to f/8, because the birds move so erratically that f/4 wouldn't keep an eye sharp. "I couldn't use an aperture of f/4 on a hummingbird," she writes; "I need that extra depth of field to ensure a sharp eye on the bird". The lesson: enough depth of field to land the eye beats a creamy background you focused past.
And the other overcorrection — "I'll just stop all the way down to f/22 to get everything sharp" — has a physics tax most guides skip. As the optics reference Cambridge in Colour explains, too small an aperture softens the whole image through diffraction; the blur from diffraction "quickly becomes more of a limiting factor than depth of field as the aperture gets smaller". So a tiny aperture is not a free path to sharpness front-to-back. There's a sweet spot, and for animals it's usually nearer the wide end than the narrow.
One myth worth killing while we're here, because it changes how you think about a long lens. It's widely repeated that a longer focal length gives you shallower depth of field. Strictly, that's not what's happening. At the same magnification, depth of field barely changes with focal length at all — a telephoto only appears to give a shallower, blurrier background because it magnifies the subject and enlarges the out-of-focus area behind it. In everyday terms, standing in one spot, a longer lens does give you a more blurred background — just know that it's the magnification doing the work, which is why backing up or moving the animal farther from its background also smooths the bokeh.
Enough depth of field to land the eye beats a creamy background you focused past.
ISO and the noise tradeoff: the part everyone gets backwards
Now for the setting people fear most, and understand least. The fear is that raising ISO "adds noise," so the instinct is to keep it pinned low and let the shutter or aperture suffer. That instinct ruins more wildlife photos than high ISO ever has.
Start with what ISO actually is, because the popular description is misleading. ISO is often called "sensitivity," and even some manufacturer guides describe it that way. But more rigorously, ISO doesn't change how much light your sensor collects at all — it amplifies the signal after the light is captured. Think of it as the volume knob on the signal, not a way to gather more light. That distinction is the key to the whole subject.
Here's the truth that follows from it, laid out cleanly by DPReview's Richard Butler: most of the noise in your images doesn't come from your camera — it comes from the light itself. Light arrives as discrete photons at random intervals, and when you capture few of them (a dark exposure), that randomness shows up as visible noise; when you capture many (a bright, generous exposure), the randomness averages out and the image looks clean. He uses a rain analogy: leave test tubes out in the rain for a split second and they'll hold wildly different amounts — but leave them out longer and they all fill to nearly the same level. More light captured equals a higher signal-to-noise ratio equals a cleaner photo. As Butler puts it, the noise "is inherent in the randomness of the light you captured and it's primarily dependent on the exposure you chose".
So what is high ISO actually doing to your noise? When you shorten the shutter or close the aperture and then raise ISO to compensate, you've captured less light and amplified the result — and amplifying a weaker signal makes the noise more visible. The ISO isn't the villain; the small amount of light is. This is why the worst thing you can do in low light is under-expose and plan to "brighten it later," because pushing up the shadows in editing is, as Iceland's Tony Prower bluntly notes, "the biggest producer of noise".
Which brings us to the single most freeing idea in wildlife exposure, from photographer Scott Donschikowski: "ISO noise in an image can be corrected in post-processing. Motion blur cannot". He spent years setting ISO low to chase noise-free files and came home with motion-blurred wildlife shots as proof it was the wrong priority. The question he poses is the one to keep in your head: what's more important, a sharp image with no motion blur, or a noiseless image? For wildlife, it's the sharp one, every time.
That doesn't mean ISO is a free dial. Lower is still cleaner, and base ISO (the lowest native setting, often 100) gives the best image quality, least noise, and widest dynamic range — so use it when the light lets you. The way to earn a lower ISO isn't to sacrifice the shutter; it's to feed the sensor more light some other way: open the aperture wider, or use a slower shutter only if the subject genuinely allows it. For a beginner on an older body, a reasonable comfort range is roughly ISO 100 to 800, with newer full-frame cameras staying clean to 3200 or 6400. But know your own camera's ceiling and don't be afraid of it — as Tamron's guide puts it, "in many cases, a slightly noisier image is preferable to motion blur or missed focus".
Most of the noise you fear isn't coming from your camera. It's in the randomness of the light you chose to capture.
Metering for fur and feather: why your camera lies about a white bird
Here's a failure that catches every wildlife photographer: you shoot a beautiful white egret and it comes out a dingy grey, or a glossy black raven and it comes out washed-out and flat. Your camera didn't malfunction. It did exactly what it's built to do — and that's the problem.
Every in-camera meter reads reflected light and is calibrated to render whatever it's pointed at as middle gray — a standard tone around 18% reflectance (cameras vary; usually 10–18%). That works when a scene averages out to roughly mid-tone. It falls apart on subjects that don't. Point the meter at a white animal and it sees "too bright" and darkens the exposure until the white turns grey; point it at a black animal and it brightens until the black turns muddy. The classic illustrations are a white dove in snow (comes out underexposed) and a black dog on charcoal (comes out overexposed). PictureCorrect's wildlife-specific version adds the cases you'll actually hit: a pale animal against a dark background gets overexposed, a dark animal against a pale background gets underexposed, and pied animals like magpies blow out their white patches.
The fix has three parts. First, pick a metering mode that suits the subject. Evaluative/matrix metering (the smart, whole-scene default) is fine for evenly toned, frame-filling animals; spot or center-weighted metering lets you read just the subject — invaluable for a bird against a bright sky, where you meter the bird and let the sky blow. Second, use exposure compensation to override the meter's mistake. Snow scenes essentially always need about +1 stop (more for very bright scenes, up to +2); a dark subject needs negative compensation. A white swan without positive compensation will come out grey — dial in some plus EV until the plumage looks right.
Third — and this is the habit that ties it all together — judge exposure on the histogram, not the rear screen. Your LCD's brightness and the ambient light fool you constantly; the histogram doesn't. Prower's rule is worth taping to your camera: "Trust your histogram not your eyes!". And watch your highlights: once a bright area clips to pure white, the detail is gone forever and no editor recovers it. The one exception is specular highlights — the glint of sun in an animal's eye is fine to clip. As a general safety bias, it's a little safer to slightly under-expose than to blow highlights you can't get back — though, as the next section explains, you don't want to under-expose so far that the shadows turn to noise.
A word on "expose to the right"
You'll hear experienced shooters talk about ETTR — exposing to the right. The idea follows directly from the noise physics above: push the exposure as bright as you can at base ISO without clipping the highlights, so you capture the maximum light and the best signal-to-noise ratio, then pull the brightness back in editing. The histogram sits shoved up against the right edge. It's a real technique with a real payoff in cleaner shadows — but two honest caveats. The benefit is mostly about noise, not some magical extra detail. And it's a tool, not a commandment: for an evenly lit animal, Nature TTL's Alastair Marsh simply nudges exposure +1/3 to +2/3 of a stop to the right and calls it done. For high-contrast wildlife where you're fighting to keep a white head from clipping, protecting the highlight wins over chasing the right edge.
Autofocus and drive: getting the eye sharp and not missing the moment
A perfectly exposed photo with the focus on the grass in front of the animal is still a throwaway. After motion blur, missed focus is the other great killer of wildlife frames — so the autofocus system deserves as much thought as the exposure.
Fstoppers frames AF in three layers, which is the clearest way to hold it in your head: the mode (how the camera focuses), the area (where it looks), and subject detection (what it locks onto).
Mode is the simplest call. Single AF (Canon's One-Shot, Nikon's AF-S) locks focus once and holds it — great for a perched, still subject, and it lets you lock and recompose. Continuous AF (Canon's AI Servo, Nikon's AF-C) refocuses constantly as the distance changes — this is the one for anything moving. On modern bodies the old precision penalty of continuous AF has all but vanished, so many pros leave it on as their default and only drop to single AF for slow, deliberate work. There's a genuine, useful dissent here worth knowing: Photography Life argues continuous AF "is often overused," since many animals spend long stretches resting, and a steadier single-servo lock can outperform a continuous mode that keeps hunting. Both camps actually agree on the action, though: continuous AF for a moving animal, single-point precision for a still one or when you're shooting through clutter — and the smart move is to map a button so you can flip between them instantly.
Area is where you tell the camera how much latitude it has. A single point gives you surgical control — you place it on the eye — and is the right call when you're shooting through grass or branches or want to nail a specific spot. Wider area modes and tracking modes hand the camera more room to find and follow a moving subject. Pangolin's Danielle gives the field-tested caveat that the broader, multi-point modes (dynamic-area, 3D-tracking, group-area) need a clean background — against busy foliage they'll grab the nearest leaf or a bird's wingtip instead of its eye, and group-area in particular always favors whatever part of the subject is closest, so a bird's beak or a crocodile's snout ends up sharp while the eye goes soft (stop down a little to cover yourself). Tom Bol's practical split for the latest bodies: auto-area AF when there's one obvious subject — it pinpointed a squirrel's eye in dense brush and ignored the branches inches away — and 3D-tracking when there are many subjects and you need to pick one, or to lock a distant animal and follow it all the way in.
Subject detection is the layer that genuinely changed wildlife photography. Modern mirrorless cameras run machine-learning detection for people, animals, and birds, and will find and hold the eye automatically. Canon's own setup for animal eye AF is a good template: Servo AF, Face + Tracking, the Animals subject setting, eye detection enabled. When it works, it's transformative — it "frees you from the worry of having to focus perfectly on the bird's eye, allowing you to concentrate on composition". But it has hard limits, and they're exactly where wildlife lives: in grass and branches, eye AF will lock onto surrounding leaves, so Canon's guidance is to switch to single-point spot AF for a bird tucked in cover. Nature TTL's Marsh hit the same wall from another angle — on hares running straight at him, the camera kept jumping to the high-contrast black ear-tips instead of the eye, so he switched off eye detection and put continuous AF on the head manually. The detection is a brilliant assistant, not an autopilot.
Finally, drive mode — how many frames fire when you press the shutter. Single-shot fires one frame per press and is right for still or slow subjects; continuous (burst) mode keeps firing while you hold the button, often split into a high and a low speed. For wildlife you want continuous, because the moment an animal looks up, blinks, or launches lasts a fraction of a second and a single shot will usually miss it. Modern cameras range from a few frames per second to 20 or 30 and beyond. Two practical notes. You don't need to hold the button down forever — Digital Camera World's rule is that "short bursts of three or four frames is often all that's required," even for fast action, and machine-gunning just floods your card with near-identical frames. And pair your burst with continuous AF (AF-C/AI Servo) so every frame in the sequence is refocused, not just the first.
Two extras worth knowing. Several cameras now offer pre-release capture, which buffers frames before you fully press the shutter so you catch the take-off you'd otherwise react to a beat too late. And mirrorless silent (electronic) shutter lets you shoot without the mechanical clatter that spooks skittish animals — just be aware that with very fast motion it can introduce rolling-shutter skew, so for the fastest action a mechanical shutter is still more reliable.
Eye-detection autofocus is a brilliant assistant, not an autopilot — in grass and branches it will lock the leaf, not the eye.
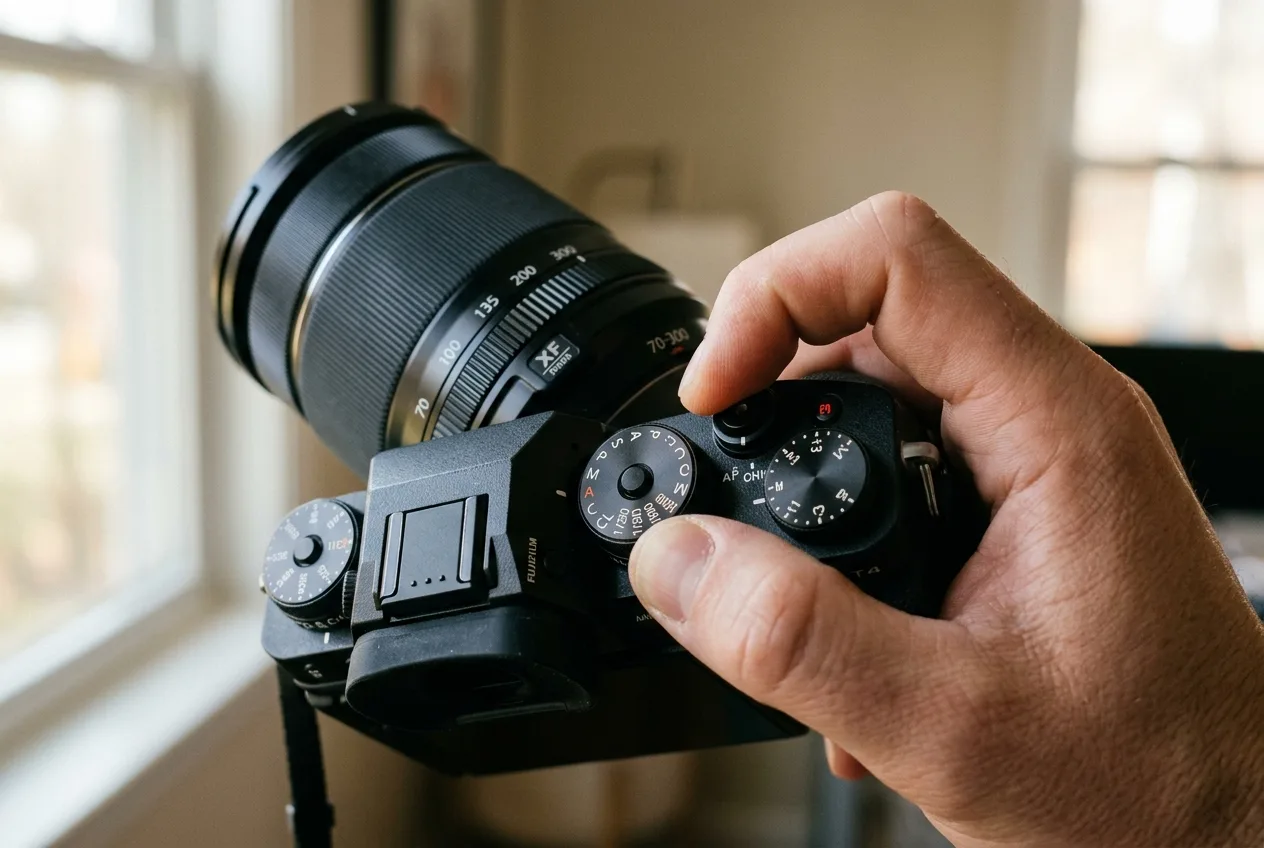
Priority modes vs. manual: how to actually run the camera
All of the above has to be driven through a shooting mode, and this is where photographers argue most — which is a clue that there's no single right answer, only trade-offs.
Aperture Priority is the classic recommendation, and a genuinely good place to start. You set the aperture (so you control depth of field and keep it wide for light), the camera sets the shutter, and you watch where the shutter floats — if it drops dangerously slow, you raise ISO. Photography Life calls it the best walk-around wildlife mode for exactly this reason: it's fast and keeps you in control of the setting that matters most. Its weakness is that you're still hand-managing ISO, and in fast-changing light that's a second job at the worst moment.
Shutter Priority flips it — you set the shutter, the camera picks the aperture. It's the mode some agencies and beginners reach for first because it directly guarantees the fast shutter wildlife needs. The catch is that the camera can swing the aperture to extremes you didn't want (wrong depth of field, or running out of lens).
The setup most working wildlife shooters have converged on is Manual mode with Auto ISO. You set the aperture and the shutter — the two settings that define the shot — and let the camera float ISO to nail the exposure. As Photography Life's Massimo Vignoli explains, it's "often the fastest way to have control over the most important settings," because you've locked your two priorities and handed the throwaway variable to the camera. And you can still fine-tune with exposure compensation: a snowy scene with a dark subject, dial +2/3; a bright subject on a dark background, dial down toward −1. The mechanics are worth setting up properly — Auto ISO lets you pick a maximum ISO ceiling you're comfortable with and a minimum shutter speed at which ISO starts to climb, so the camera protects your shutter automatically as the light fades.
When does Auto ISO not win? Tom Bol gives the sharpest answer from years in the field. Manual + Auto ISO is perfect when the light on the subject changes — a toucan flying from full sun into deep-shade jungle, two or three stops darker; the camera just tracks it. But when the subject's light stays constant and the background changes — a bird crossing from a dark hillside to a bright sky — Auto ISO gets fooled by the background and mis-exposes the bird, so Bol switches to manual ISO, exposes for the animal, and the background can't ruin it. That's the whole decision in one sentence: floating ISO for changing light on the subject, fixed ISO for a constant-lit subject against a shifting background.
And to close the mode wars honestly: it really is about what works for you. Bol points out that a famous bird photographer has shot in Aperture Priority for thirty years to widely published results. There's no single correct dial — there's the one you can drive fast and instinctively when an animal gives you two seconds.
A clean workflow to start from
Pulling it together, here's a sane default to build from and then adapt — not a recipe to follow blindly, because the whole point of this guide is that the right settings depend on the animal in front of you:
- Mode: Manual + Auto ISO (or Aperture Priority if that's faster for you), with a maximum ISO ceiling set to your camera's clean limit.
- Aperture: start wide — around f/4 to f/8 — for light and a soft background, closing a touch if you need more of the animal sharp.
- Shutter: match the subject — 1/200–1/500 s for still/slow, 1/800–1/1600 s for moving, 1/2000 s and up for fast action or flight; never below roughly 1/(focal length) handheld.
- AF: continuous AF + animal/bird eye detection for moving subjects; a single point on a button for cover and clutter.
- Drive: continuous, short bursts, paired with continuous AF.
- Check the histogram, not the screen; nudge exposure compensation for pale or dark subjects and protect your highlights.
Get out and shoot a lot of frames; review them zoomed in; learn the slowest shutter you can hold and the highest ISO your camera takes cleanly. Those two personal numbers, more than any chart, are what make the settings second nature.
If you also run trail cameras, here's where the two worlds meet: a season of trail-cam images is the cheapest scouting data you'll ever get on where and when an animal actually shows — which light, which hour, which spot — so that when you arrive with the real camera, you already know the settings the situation will demand.
Frequently asked questions
What are the best all-around camera settings for wildlife photography?
Start with Manual mode and Auto ISO, an aperture around f/5.6–f/8, and a shutter speed matched to the subject (roughly 1/500 s for still animals, 1/1000 s or faster for movement), with continuous autofocus and eye detection on. Then adapt to the light and the animal — there's no single fixed setting, only good starting points.
What shutter speed do I need to freeze a moving animal?
For a slow or stationary subject, 1/200–1/500 s is plenty; for a running animal or a bird taking off, use 1/800–1/2000 s; for small birds in flight or splashing water, go to 1/2500 s and faster. A subject coming straight at you needs a faster shutter than one moving sideways.
Is high ISO bad for wildlife photos?
Not nearly as bad as the blur you get avoiding it. Most visible noise comes from capturing too little light, not from the ISO dial, and ISO noise can be reduced in editing while motion blur can't be fixed at all — so set ISO as low as the light comfortably allows, but don't sacrifice a sharp shutter to keep it down.
Why does my camera underexpose white animals and overexpose dark ones?
Because the meter is calibrated to render everything as middle-gray, so it darkens a bright subject and brightens a dark one. Fix it with exposure compensation — roughly +1 stop for snow or white subjects, negative compensation for dark ones — and confirm with the histogram.
Should I use aperture priority, shutter priority, or manual for wildlife?
Aperture Priority is a great, fast starting point; many pros graduate to Manual with Auto ISO so they control both aperture and shutter while the camera handles ISO. Use floating (auto) ISO when the light on the subject changes, and fixed ISO when the subject is evenly lit but the background shifts behind it.
What autofocus mode is best for wildlife?
Continuous AF (AF-C / AI Servo) with animal or bird eye detection for any moving subject, and single-point AF for a still animal or one tucked in grass and branches where detection grabs the wrong thing. Mapping a button to switch between them is the practical move.