You walk back to the camera, pull the card, and there it is: 2,400 photos of an empty clearing. No deer. No fox. Just grass, sky, and the same patch of dirt over and over. If that's where you are right now, take some comfort — you are not unusual, and your camera is probably not broken. Blank rates of 90% and up are routine for a unit working exactly as designed.
Here's the short version, because you came here for an answer. A "blank photo" is almost always one of two things wearing the same disguise. Either something that isn't an animal tripped the sensor — sun-warmed grass swaying in the wind, a shadow racing across the ground as a cloud passes, a spiderweb strung across the lens — or an animal really was there and the camera missed it, firing a beat too late or too dark to show anything. The first kind, false triggers, is by far the more common, and most of it comes down to where you aimed the camera and how sensitive you set it. The second kind shows up at the edges of frames and in the dark, and usually traces back to trigger speed or weak batteries.
Below are eight fixes, ordered roughly the way I'd actually work the problem in the field — cheapest and most common first. Most empty-frame problems are solved in the first three.
First, figure out which kind of blank you have
Before you change anything, look at when the blanks happen, because that tells you almost everything.
Empty frames clustered in the middle of the day? That's the classic false-trigger signature. One practitioner who logged triggers by the hour for a camera in Maine found that nearly all the false ones landed between 9 a.m. and 5 p.m., while almost every real animal came through earlier or later. Sun and wind are daytime problems, and they leave a daytime fingerprint.
Blanks at night, or photos that are simply black? That points at power and the infrared flash, not the sensor.
Animals you can just see slipping out the edge of the frame, or a tail leaving the shot? That's trigger speed.
And if you want to settle the "is my camera actually defective?" question once and for all, run the test GardePro recommends: put the camera in a completely dark, motionless room — a closet works — facing a blank wall, and leave it for 24 hours. If the card is empty afterward, the hardware is fine and your problem is environmental. If it's still snapping pictures of a still wall, you've got a genuine fault.
Now, the fixes.
Fix 1: Check the batteries (this is the one that matters most)
If your camera is taking black photos at night, or it quit recording for a stretch and then "mysteriously" started again when the weather warmed up, stop reading and go check your batteries. Specialists who do this for a living are blunt about it: the most common cause of a trail camera not working normally is insufficient power from improper or old batteries. The retailer TrailCamPro says flatly that "Why does my camera take black photos at night?" is their number-one customer question — and the usual culprit is alkaline cells.
Here's the mental model. A camera needs a hard jolt of current to fire its infrared flash, and the no-glow (invisible) flash cameras are especially hungry, pulling up to 1,000 mA the instant they flash. Alkaline batteries start around 1.5 volts but begin sagging the moment you install them, and they keep sagging with every shot. Daytime photos look fine because day shots barely sip power. But each night photo comes out a little dimmer than the last, until the flash can't fire at all and you get pure black — or the camera browns out and shuts off entirely. So you get blanks at night while daytime looks perfect. That pattern is alkaline batteries, almost every time.
Cold makes it dramatically worse. Alkaline performance starts dropping at around 5°C (41°F), and below that they put out only about a fifth of their rated power. In one Scottish winter study, cameras burning a lot of flash chewed through a set of batteries in roughly three days. That's the "worked again when it warmed up" mystery — the cold was throttling the batteries, not killing the camera.
What to do:
- Use lithium. Single-use lithium AAs run at about 1.6 volts per cell — TrailCamPro's people say "they run hot" — which means a stronger, longer-reaching flash, and they're the least bothered by temperature, hot or cold. University of Florida extension guidance reaches the same conclusion: lithium offers the best overall lifespan.
- Be careful with rechargeables. Standard NiMH rechargeables settle to about 1.2 volts per cell, which is below the 1.5V many cameras expect. Four of them make only 4.8 volts, and a lot of cameras shut off around 5 volts — so they simply won't run. NatureSpy found that among rechargeables, only Panasonic Eneloop Pro reliably powered most cameras, and even those need swapping every 9–12 months.
- Don't trust the battery meter. Those readouts are unreliable. If you run several cameras, a £10 multimeter pays for itself. On a typical 8-AA, 12-volt camera, a fresh set of lithium reads about 14–14.5V; swap them out before they drop below 13V and you'll avoid most dead-of-night failures.
One more, easy to miss: battery brand and formulation can bite you. Browning's experts warned that a Duracell formula change started causing some cameras to stop triggering or flashing at night once the cells dropped to around 30%. And don't leave dead batteries sitting in a camera — corrosion is, in the words of one land-management panel, "one of the primary killers of trail cameras".
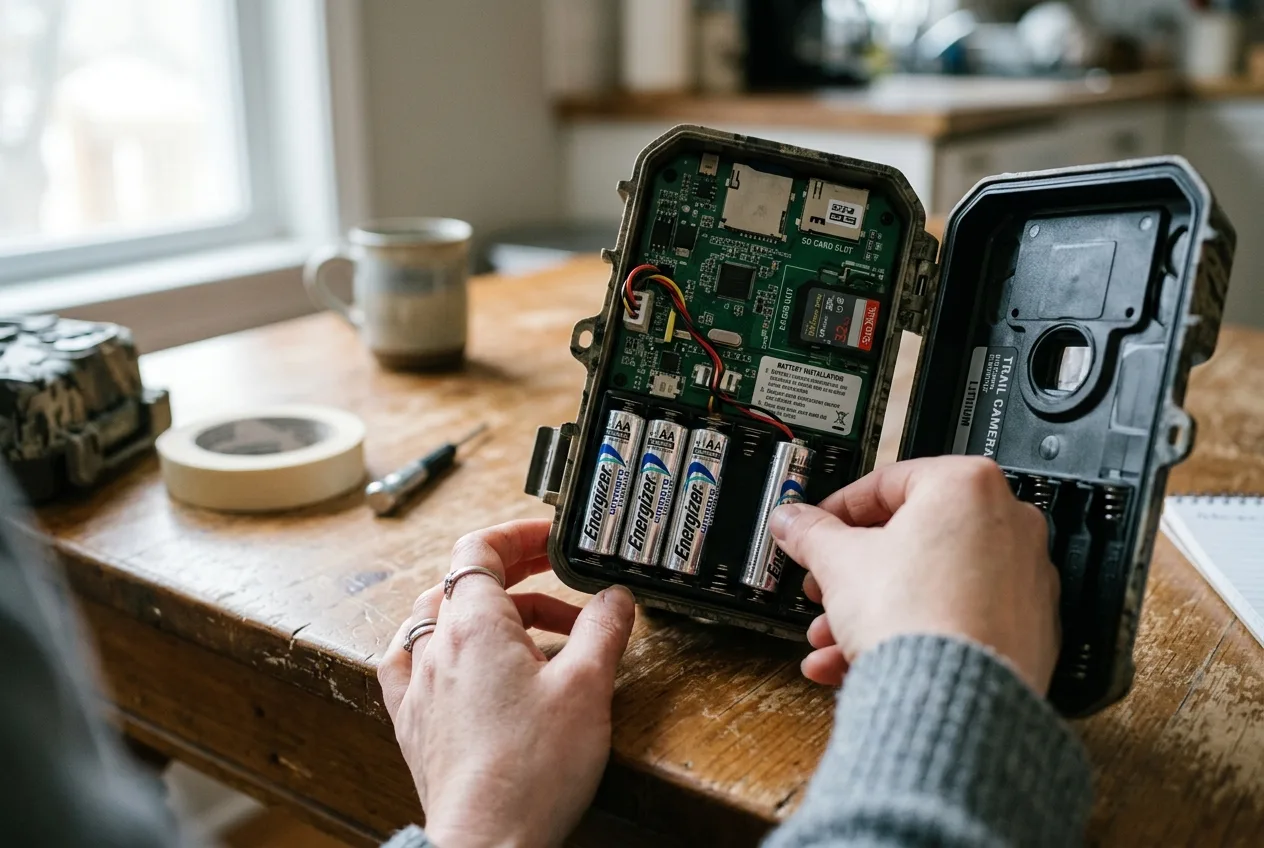
Fix 2: Format the SD card (and check it isn't locked)
The card is the second thing I check, because the fix is free and takes thirty seconds.
A corrupted card can make a camera fail to save anything, or save garbage files you can't open — which looks a lot like "no photos" when you get home. The cure is to format the card in the camera, not on your computer. Formatting resets the card to a clean state and clears corruption, and doing it in the camera avoids the file-system mismatches a PC format can introduce. This matters most on a card's first use, or any time it's been in another device. Several experts go further and say format the card every single time you redeploy it — leftover formatting from another camera or a phone is a real source of trouble.
While you've got the card out, check the tiny grey slider on its edge. If it's been knocked to the locked position, the camera physically cannot write to it, and you'll get a deployment of nothing.
A few card-buying notes, since the wrong card causes its own headaches:
- Don't overspend on speed. A minimum write speed of 10 MB/s (look for the V10 or U3 symbol) is plenty for a trail camera. Counterintuitively, ultra-fast cards can actually cause problems — a 16GB or 32GB Class 4 card is ideal for most cameras.
- Match the capacity to the camera. Maximum supported size ranges from 16GB to 512GB depending on the model, so check the manual. For routine use, 32–64GB is fine; bump to 64GB+ if the camera will sit unattended for a month.
- Skip microSD-in-an-adapter if you can. Some cameras, Browning and Bushnell among them, don't get along with adapters.
This is also where firmware bugs hide, and they can be brutal. One technician documented a bug in certain Browning Edge, Elite HP4, and HP5 cameras where the firmware tried to run the SD card at its maximum speed, corrupted the card while creating its first folders, then crashed — leaving the camera stuck on the splash screen and draining the whole battery pack in about a day. A user in the comments said it "ruined half of my 3 season camera placements." The practical takeaways even if you never touch firmware: on affected models, avoid cards rated over 80 MB/s, and if your card keeps coming back corrupted, check the manufacturer's site for a firmware update — a "simple firmware or software update can fix" a surprising range of issues.
This is also where firmware bugs hide, and they can be brutal.
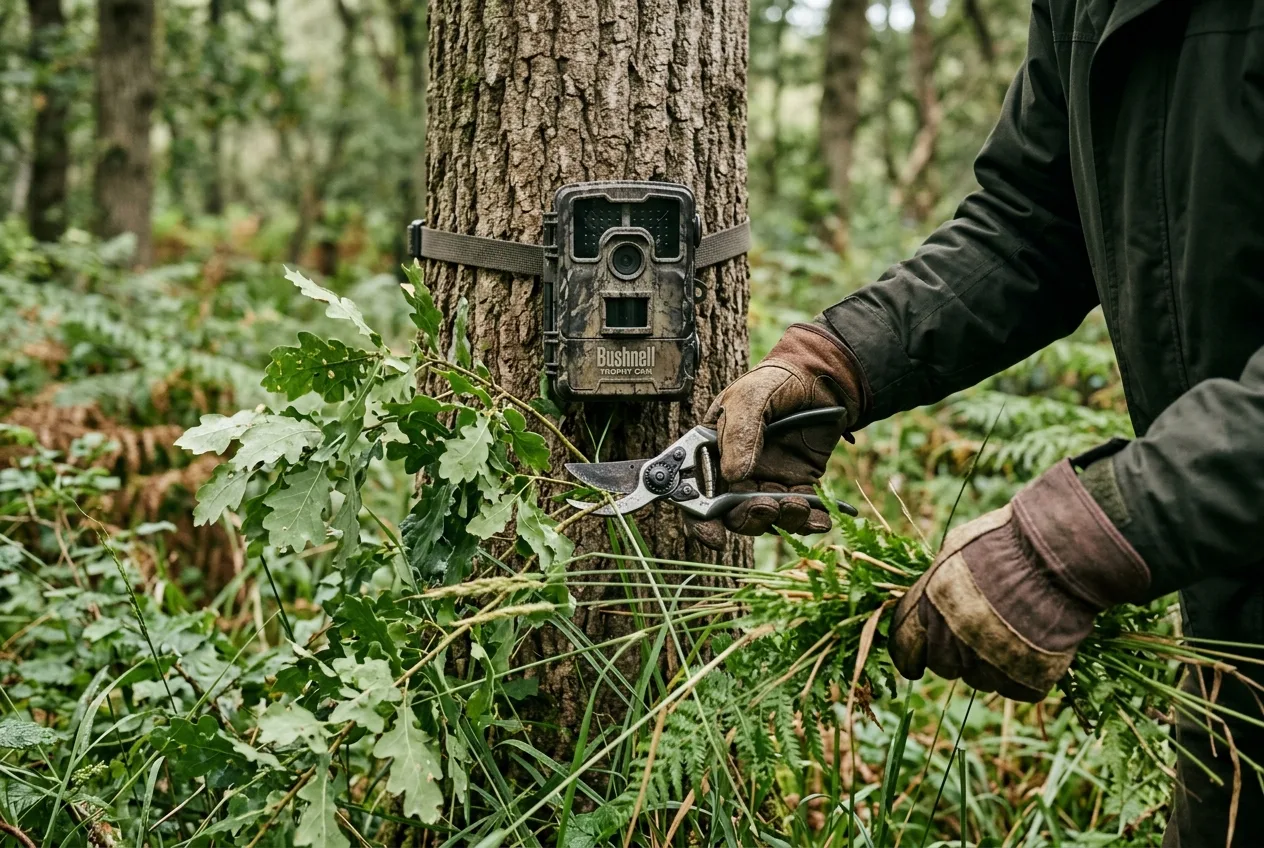
Fix 3: Clear the vegetation in front of the camera
If your blanks are daytime and you've ruled out the obvious, look at what's growing in front of the lens. This is the single biggest cause of empty daytime photos.
To understand why, you have to know what the sensor actually does. A trail camera triggers on a passive infrared (PIR) sensor, which needs two things at once: motion and a change in heat. It does not see an image. Inside is a sensor with just two infrared-sensitive halves; when one side gets "brighter" in infrared and the other "darker," it fires. When both change together — like the whole scene warming through the afternoon — it ignores it. That two-pixel design is clever, but it's easy to fool.
Sun-warmed vegetation is the classic trick. TrailCamPro calls leaves and tall grass "the #1 culprits for producing false triggers and empty photos". Picture a sunny, breezy day in a clearing: sunlight heats the grass and leaves, the wind shoves that warm vegetation across a patch of cooler shaded ground, and to the sensor that moving warmth looks exactly like an animal crossing. The University of Florida found that very high sensitivity in tall grass produces "large numbers of photos of vegetation swaying in the wind".
The fix is unglamorous but effective: cut it back. Carry clippers and a small saw, and clear the grass, weeds, and any branches in the detection zone — the fan-shaped area in front of the lens. Pay special attention to anything within 3–4 feet of the sensor; vegetation that close can create a temperature difference between its sunny front and shaded back and trip the camera on its own.
Two cautions from people who've chased this:
- Small stuff matters less than you'd think. As one expert panel put it, "small leaves or twigs shouldn't produce many false triggers. BUT… if a large branch moves due to wind, the camera may see both the movement and the temperature behind it," and that triggers it.
- Vegetation grows. A spot you cleared in early spring can be a jungle by June, so either pick a site without signs of fast growth, or plan to come back and re-trim.
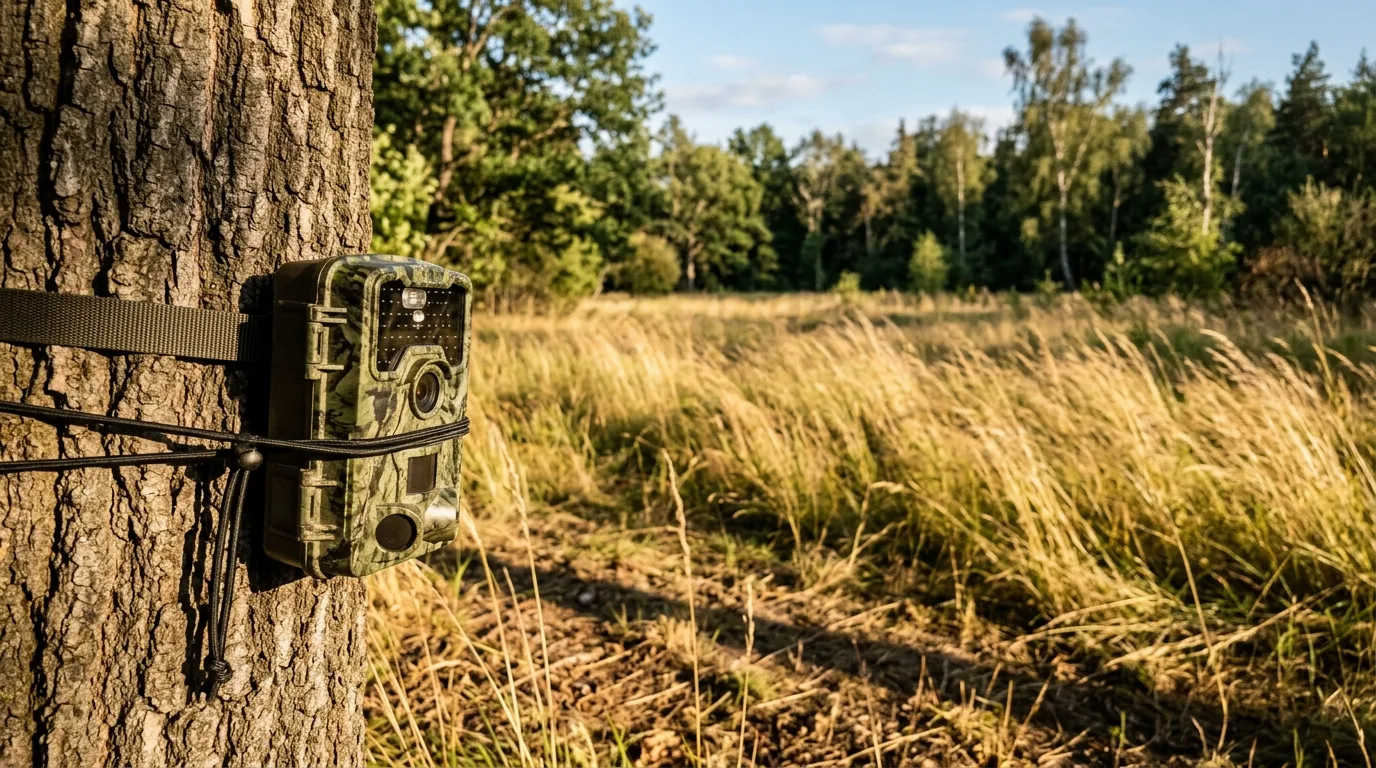
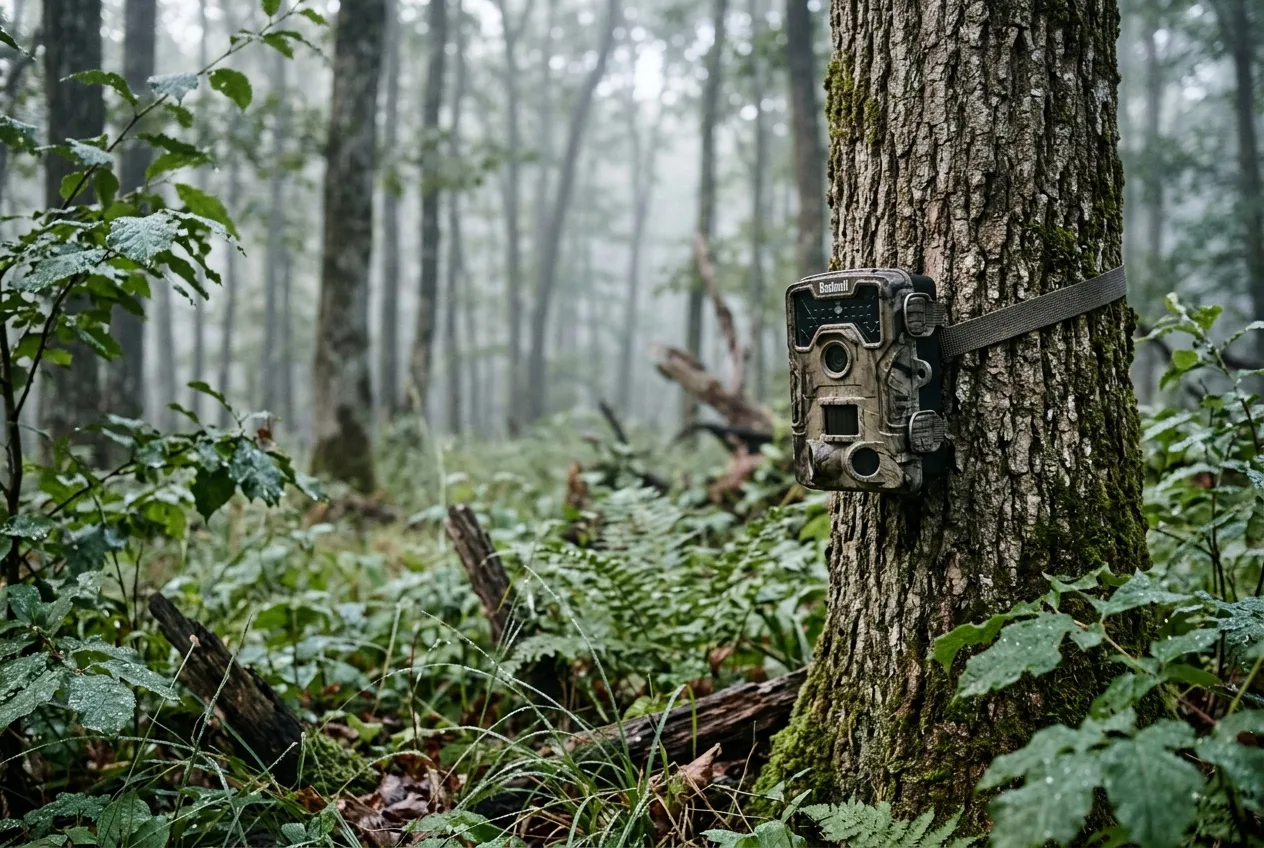
Fix 4: Aim the camera toward the pole (and never into the sun)
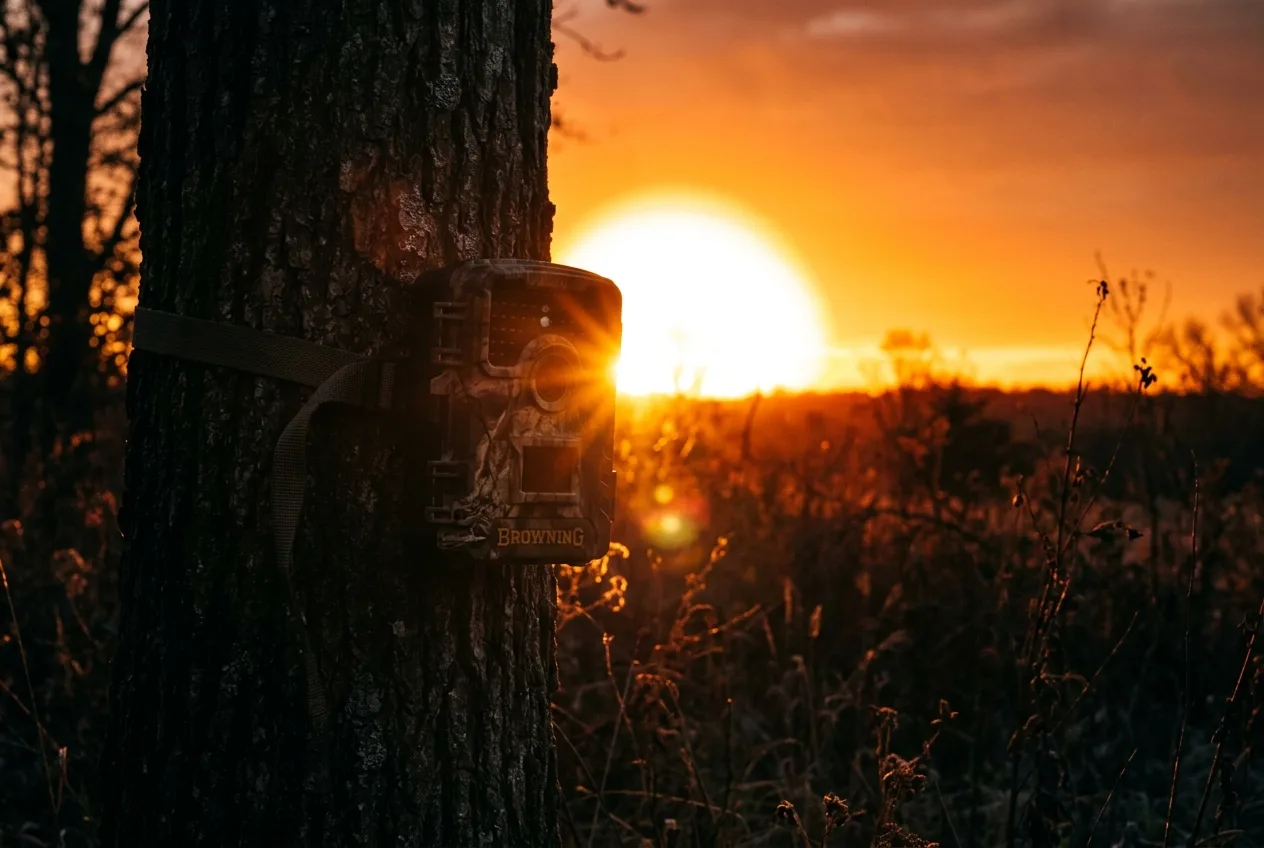
Even with the brush cleared, pointing the camera the wrong way fills your card with sun-driven blanks. The advice here is refreshingly unanimous across manufacturers, retailers, and biologists alike: aim it away from the midday sun — north in the northern hemisphere, south in the southern — and never point the lens directly east or west.
The reasoning is twofold. First, exposure: aiming at the rising or setting sun blows out the image into a useless white frame, the same way a photographer keeps the sun at their back. The camera's onboard light meter samples the scene and sets exposure before every shot, so a lens staring into low sun simply overexposes. Second, and more subtly, the sun is a heat source the PIR can "see." When direct sun hits the sensor it can spike the temperature reading so hard that the camera enters a runaway state and fires constantly. East and west put the sun right in the sensor's face at dawn and dusk; facing the pole keeps it out.
There's a related trap worth naming: water and rock. Avoid pointing a camera into a sunlit body of water — wind-blown ripples reflect the sun's infrared straight into the sensor and can trigger it nearly nonstop all day. Bare rock and dark soil are nearly as bad, because they soak up and release heat far more aggressively than grass; one specialist's most successful rock-backed sets were all in deep shade. And watch for the cloud effect: when a cloud slides across the sun, the ground temperature can drop several degrees in seconds, and the sensor reads that sudden change as motion.
East and west put the sun right in the sensor's face at dawn and dusk; facing the pole keeps it out.
Fix 5: Tune the sensitivity to the weather
Sensitivity is the dial most beginners never touch, and it's often the difference between a clean card and a junk one. But it's a genuine trade-off, not a "set it high and forget it" switch.
Here's the tension. Crank sensitivity up and the camera catches more animals — but it also fires at more swaying grass, more shadows, more nothing. A rigorous field experiment using 45 cameras confirmed that the number of blank images is higher when sensitivity is higher, and that the fewest photos per day came at low sensitivity, across every model tested. Turn it down to kill the false triggers, and you start missing real animals — smaller and faster ones especially. The University of Florida's nuance is the useful middle ground: lowering sensitivity "can reduce unwanted photos of swaying plants without much of a loss in the ability of the camera trap to detect and photograph medium and large wildlife". In other words, if you're after deer-sized animals in a windy spot, dialing it back a notch is usually a smart trade.
The counterintuitive part is hot weather. When the air temperature climbs toward an animal's body temperature, the contrast the sensor relies on shrinks — a rock baking at 100°F (38°C) is nearly as warm as a deer. On a hot afternoon a PIR actually reacts less sensitively, so the move is to set sensitivity high, not low, to recover the smaller heat differences. Cold and snow are the reverse: in freezing conditions with snow on the ground, a low setting cuts the noise while still catching warm-blooded animals against the cold backdrop, and it saves battery and card space too.
A simple way to think about it, from Burrel's support guide:
- Low: winter, snow, freezing conditions, open areas — fewest blanks, but may miss fast or faint targets.
- Normal: the default; good for ordinary game, can still throw blanks on very windy days.
- High: hot weather, or small fast subjects like birds — catches the most, but consumes the most power and fills the card fastest.
Fix 6: If animals are slipping the frame, it's trigger speed
Sometimes the blanks aren't false triggers at all — the animal was genuinely there and the camera just missed it. The tell is photos where something is leaving the edge of the shot, or empty night frames that bracket a real animal by a minute or two.
Trigger speed is the lag between the sensor detecting motion and the shutter actually firing. On a quality camera it's roughly half a second or less; on cheap ones the video trigger can run over three seconds, which is exactly why "you just see the tail of something leaving the frame". The gap between good and bad is larger than the spec sheet suggests. A 2025 study pitting a budget camera (0.5-second trigger) against a high-end control (0.1 second) found the slower camera racked up 192 missed detections to the control's 8 — and the budget and a vintage model captured just 1 of 22 predator events between them. Fast-moving animals at the edge of the frame, the authors note, are far more likely to be missed by the slower camera. Telltale sign of this exact failure: the budget cameras sometimes fired a blank night frame 1–3 minutes before or after the control caught a fox — triggered by the animal, but too late to catch it.
You can't make a slow camera fast, but you can stack the deck:
- Aim across the trail, not down it. Set the camera at roughly a 45-degree angle to the path so an animal crosses the detection zone and stays in frame longer, rather than walking straight at the lens and clearing it before the shutter fires.
- Use the side sensors if you have them. Many cameras have a wide (~120°) detection angle with side sensors that "pre-activate" — waking the camera as an animal approaches from the side so it's ready to shoot when the animal hits center frame.
- Know your camera's limits. Even good cameras struggle with a sprinting animal. In one trial, no camera could catch a stoat running flat-out, though trigger speeds of 0.2–2.1 seconds caught the same animals easily when they walked or paused. Some of this is just physics.
A note on what trigger speed won't fix: a moving branch, contrary to a common worry, generally won't trigger a camera on motion alone, because a branch isn't a meaningful change in heat — it's the sun-warmed-vegetation combination from Fix 3 that gets you, not bare movement.
Sometimes the blanks aren't false triggers at all — the animal was genuinely there and the camera just missed it.
Fix 7: For black night photos, check the flash chain
Black or near-black night frames deserve their own look, because they have a few distinct causes beyond batteries (which, again, are the leading suspect — see Fix 1).
If daytime is fine but nights are dark, and your batteries are fresh lithium, suspect the infrared cut filter. This is a small motorized filter that swings out of the way at night to let infrared in, and swings back during the day to keep daytime colors true. It's often the only moving part in the camera. When it sticks in the engaged position at night, it blocks the flash's infrared and you get dark night photos — even though the flash is firing. (Stuck the other way, in daytime, it gives you the opposite tell: pink or red-tinted day photos.) The surprising root cause, one teardown found, usually isn't the motor failing — it's a cold solder joint on the motor's wires going intermittent over time. The first thing to try is simpler, though: pop in fresh lithium batteries, since low voltage alone can mimic a filter fault, and only then chase the filter or send it in under warranty.
Two more night gremlins:
- Night-vision range falls off. Budget cameras with weaker IR illumination simply can't light up an animal past a certain distance, so a deer that's plainly visible by day vanishes into a black frame at night.
- IR reflecting off snow. Occasionally the opposite happens — the flash bounces off a bright surface like snow and floods the frame into a blown-out white blank. Even a top-tier control camera produced 14 such overexposed images in one snowy study.
If you're choosing a camera and night ID really matters to you, it's worth knowing the flash type trade-off: in a controlled comparison, 33% of infrared-flash photos couldn't be identified to species versus just 5% for a white (visible) flash — though white flash is more likely to spook wary animals.
Fix 8: Clear condensation, moisture, and a dirty lens
Last, the photos that aren't black or empty but foggy — a hazy, milky veil over everything. That's almost always moisture on or in the camera, and it's a seasonal classic that shows up when a camera that ran clean all summer suddenly fogs once cool weather arrives.
The mechanism is just dew point. WiseEye describes the two cycles cleanly: on a cool morning, warm air hits a cold lens and condenses; or a camera that baked in the sun all day meets cool night air and fogs as it cools. Moultrie adds the part that actually costs you images — condensation on the lens "can distort or even ruin any images captured before it evaporates," and moisture inside the shell quietly corrodes the batteries and circuit board over time.
What helps:
- Site it in the shade, not the open. Fogging is far more common on cameras out on a sunny field edge. Back the camera into the woods a few yards so the lens isn't heating and cooling through a big daily swing. Mounting it around 5 feet up at a slight (10°) downward tilt also lets moisture run off the lens rather than pooling.
- Toss in silica gel. A few of those little desiccant packets inside the case absorb up to three times their weight in moisture — just replace them now and then.
- Air it out when it fogs. A tell-tale haze means it's time to open the camera at home, pull the battery tray and card, and let it dry indoors for a day or two.
- Wipe the glass. A mucky lens or a smear of pollen ruins shots too. Clean the lens, sensor window, and LED covers with a microfiber cloth, wiping in concentric circles from the center out. And check for cobwebs while you're there — a spider spinning a web across the sensor is, in GardePro's words, magnified "by being so close to the sensor" and at night "can look like a massive heat source," which is why a camera "running away with thousands of photos at night" so often has a spider on it.
A tell-tale haze means it's time to open the camera at home, pull the battery tray and card, and let it dry indoors for a day or two.
When the camera is fine and the woods are just empty
One honest caveat before you tear your setup apart: sometimes the gear is working perfectly and the animals genuinely aren't there. If a spot that used to produce suddenly goes quiet, you may simply be pressuring the wildlife. Checking a camera too often leaves human scent that can push a mature buck nocturnal — which is why experienced hunters check no more than every 10–14 days. Before you start swapping parts, do the thirty-second sanity check the biologists do: wave your hand in front of the lens and confirm it takes your picture. If it does, the camera's listening; the clearing's just empty.
Work the list in order, and the empty frames usually fall away fast. Batteries, card, brush, aim — that's where four out of five blank-photo problems actually live. Trail Camera Placement for Beginners: Height, Angle, and Direction
Frequently asked questions
Why is my trail camera taking pictures of nothing?
A "blank photo" usually means the camera's heat-and-motion sensor was tripped by something that wasn't an animal — most often sun-warmed grass or branches moving in the wind, a shadow from a passing cloud, or even a spiderweb on the sensor. Clear the vegetation in front of the lens, aim the camera toward the nearer pole (north in the northern hemisphere, south in the southern) so the sun isn't in the sensor, and lower the sensitivity a notch in breezy spots.
Why does my trail camera take black photos at night but good photos during the day?
This is almost always batteries. Night shots need a hard burst of power for the infrared flash, and weak or alkaline cells can't deliver it even though they have plenty left for low-power daytime shots — so nights come out black. Switch to lithium AAs; if that doesn't fix it, the camera's infrared filter may be stuck and need service.
Does cold weather make a trail camera take blank photos?
Yes. Alkaline batteries lose roughly 80% of their output below about 5°C (41°F), which starves the flash and can shut the camera down — then it appears to "fix itself" when the weather warms. Lithium batteries function normally down to around –15°C and are the right choice for winter.
Should I set my trail camera sensitivity high or low to stop blank photos?
It depends on the weather. In windy or grassy spots, a lower setting cuts false triggers without losing many deer-sized animals. But in hot weather, set it high: when the air is near an animal's body temperature the sensor reacts less, so it needs the extra sensitivity to detect anything at all.
How do I know if my trail camera is broken or just false-triggering?
Run the closet test. Put the camera in a dark, completely still room facing a blank wall and leave it 24 hours. An empty card means the hardware is fine and your blanks are environmental; a card full of photos of a still wall means a genuine fault. Also try a hard reset — pull the batteries, reinstall, and reset to factory settings — before assuming the worst.
Which fix should I try first for blank trail camera photos?
Batteries, then the SD card, then vegetation and camera aim — in that order. Specialists agree the most common cause of a misbehaving camera is simply weak or wrong batteries, and most empty-frame problems are solved before you ever touch the advanced settings.